Automation(Formerly known as Robot)
The Automation is able to connect the data in datasheets with various business systems and Apps and automatically performs specified operations according to preset trigger conditions to help you complete repetitive work, decreasing your workload.
Below are some scenarios using a Automation:
E-commerce
- When a new form is submitted, the automation will automatically change the order status
Inventory management
- When the order status is changed to shipped, the automation will automatically reduce the number of stocks
Sales management
- When the "Sales leads" datasheet and "Sales records" datasheet are linked with each other, and there is a new record added to the "Sales leads", the automation will automatically add this new record into the "Sales records" datasheet as well.
Steps for starting automation
There are three steps:
Step 1: Create Automation Node
Click the "add" icon at the top left corner to view the list can be created:
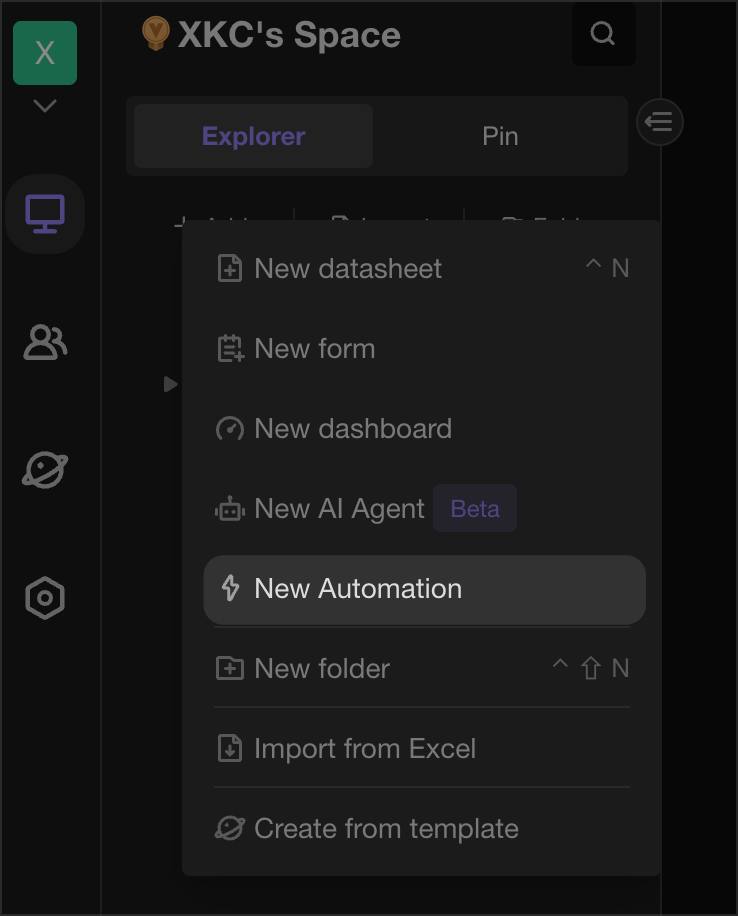
To create an automation node, click on "New automation" in the list. An Automation node will then be created and jump to the Automation Configuration panel.
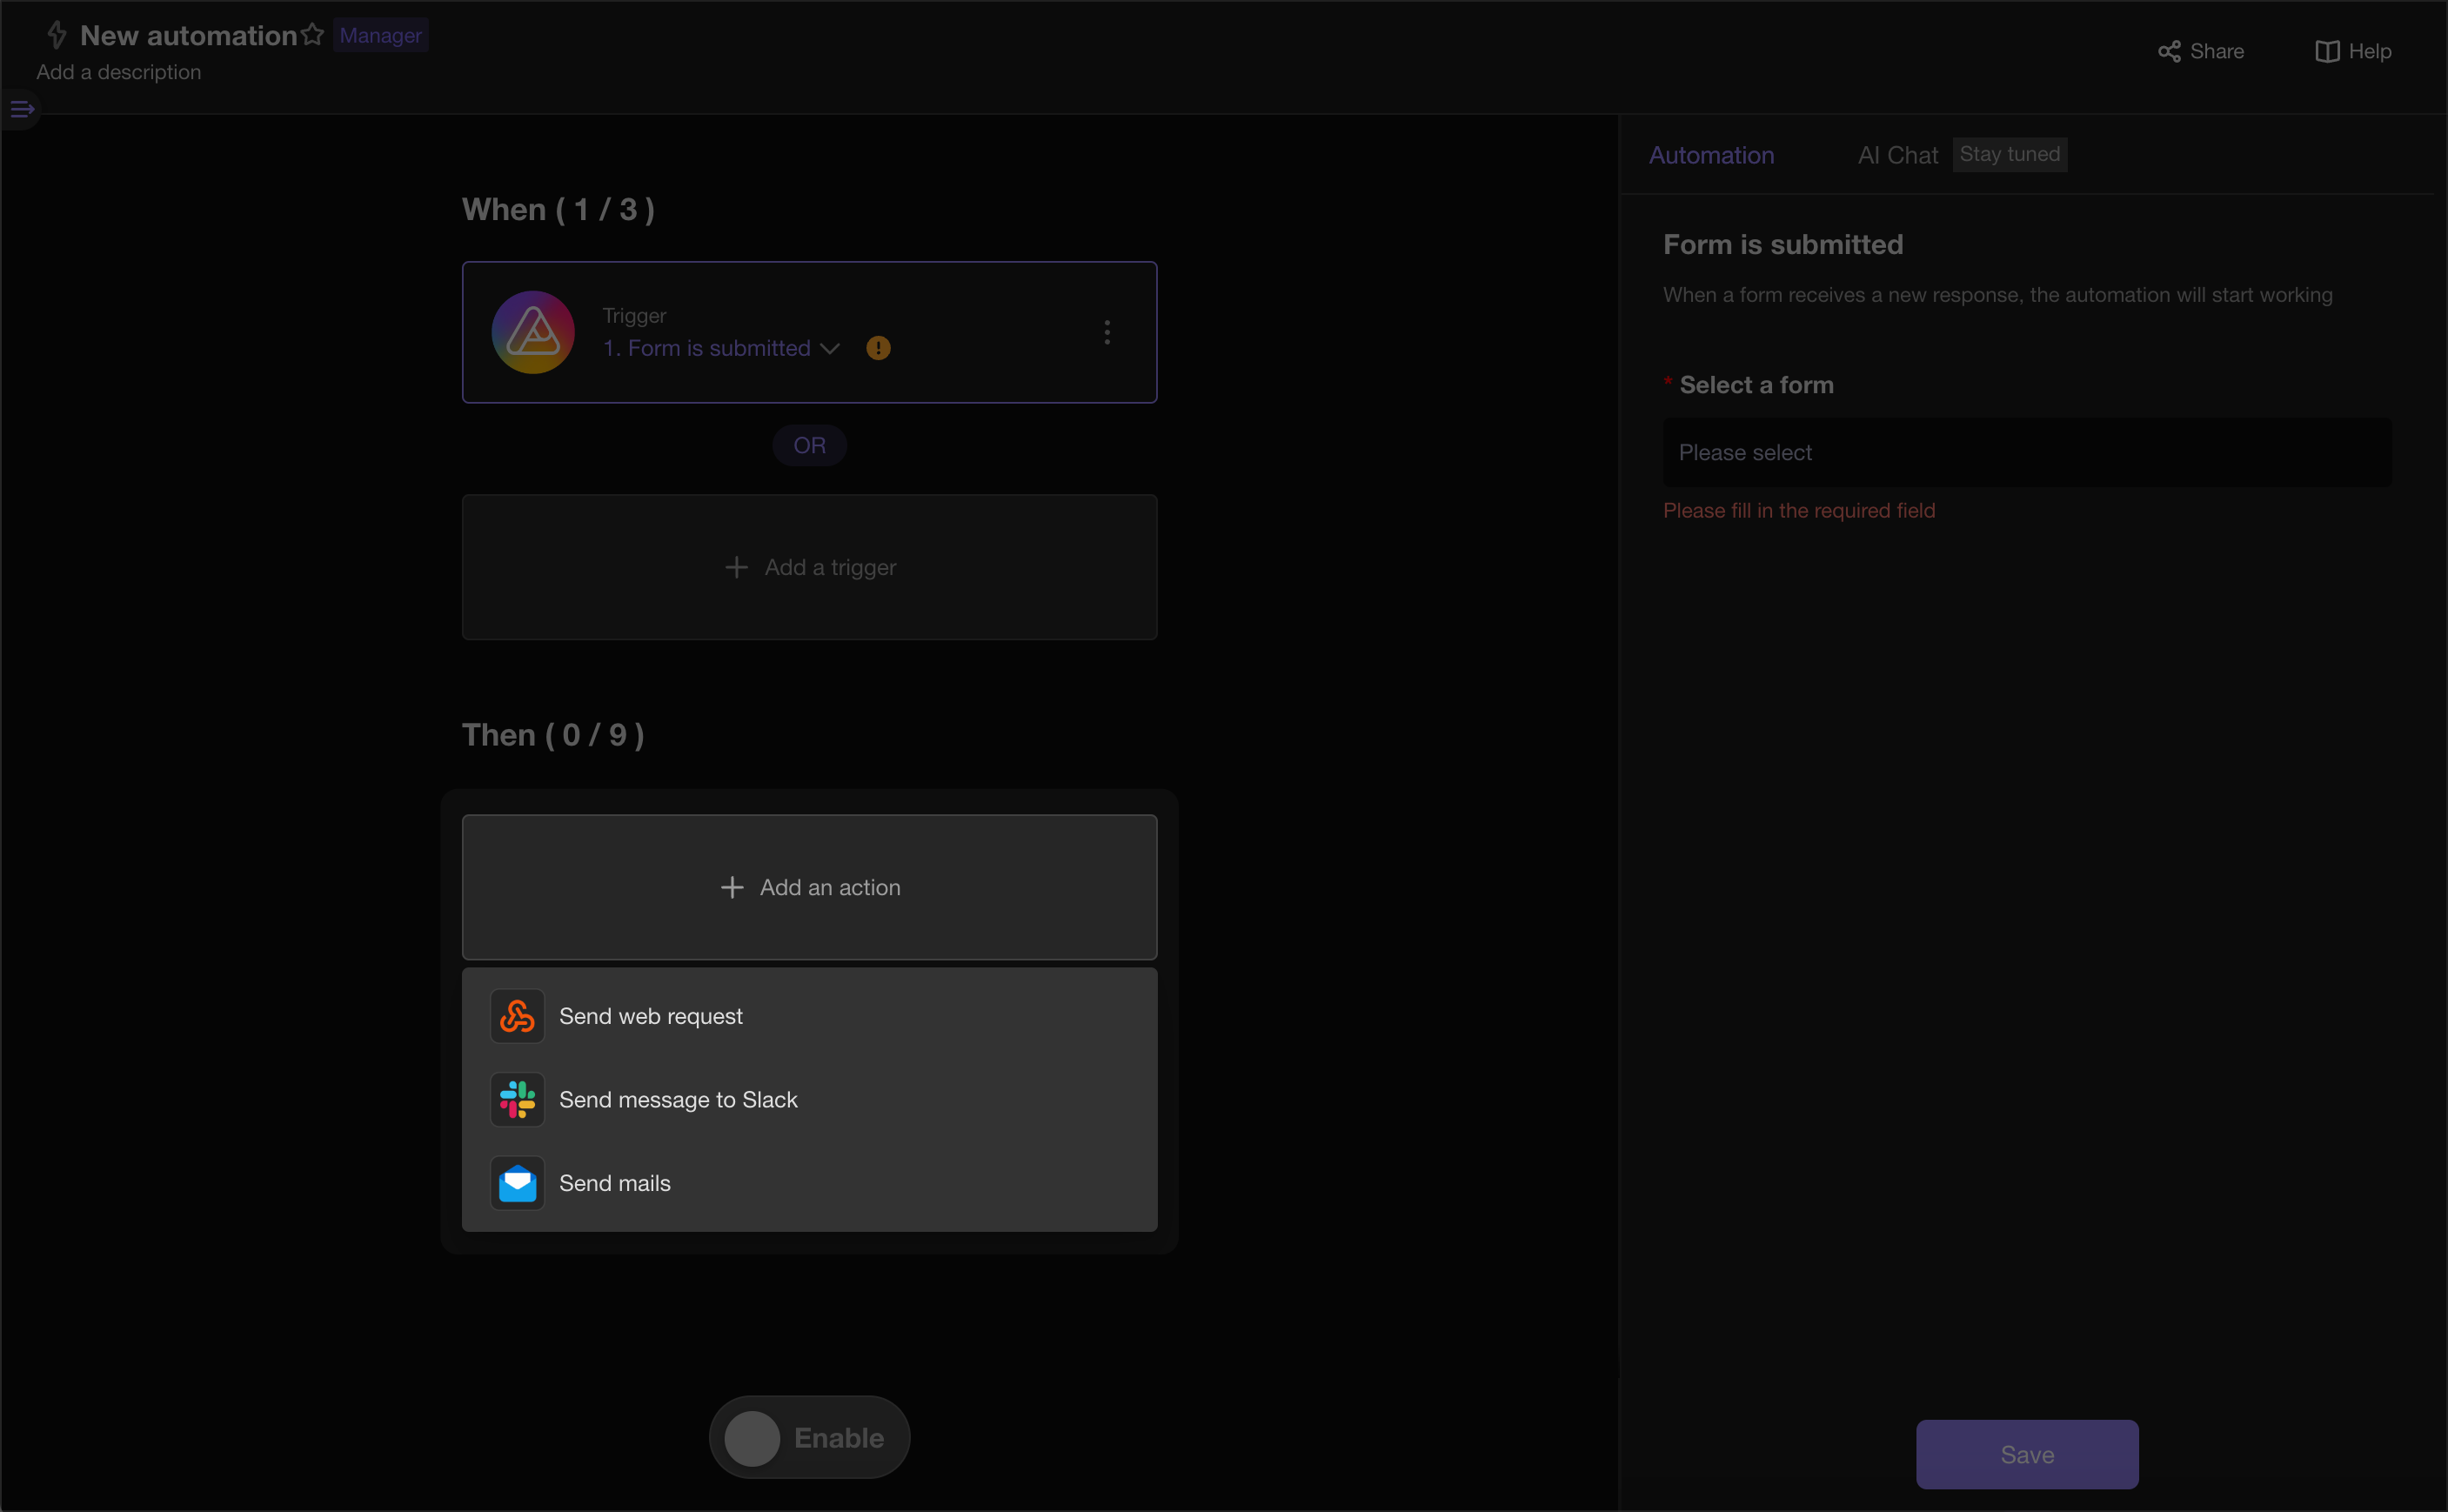
Step 2: Configure the triggers and actions
After entering the automation configuration panel, you can choose up to three trigger conditions for each automation. Once any of these conditions are met, the automation will be triggered. Don't forget to click "Save" after configuring the trigger conditions.
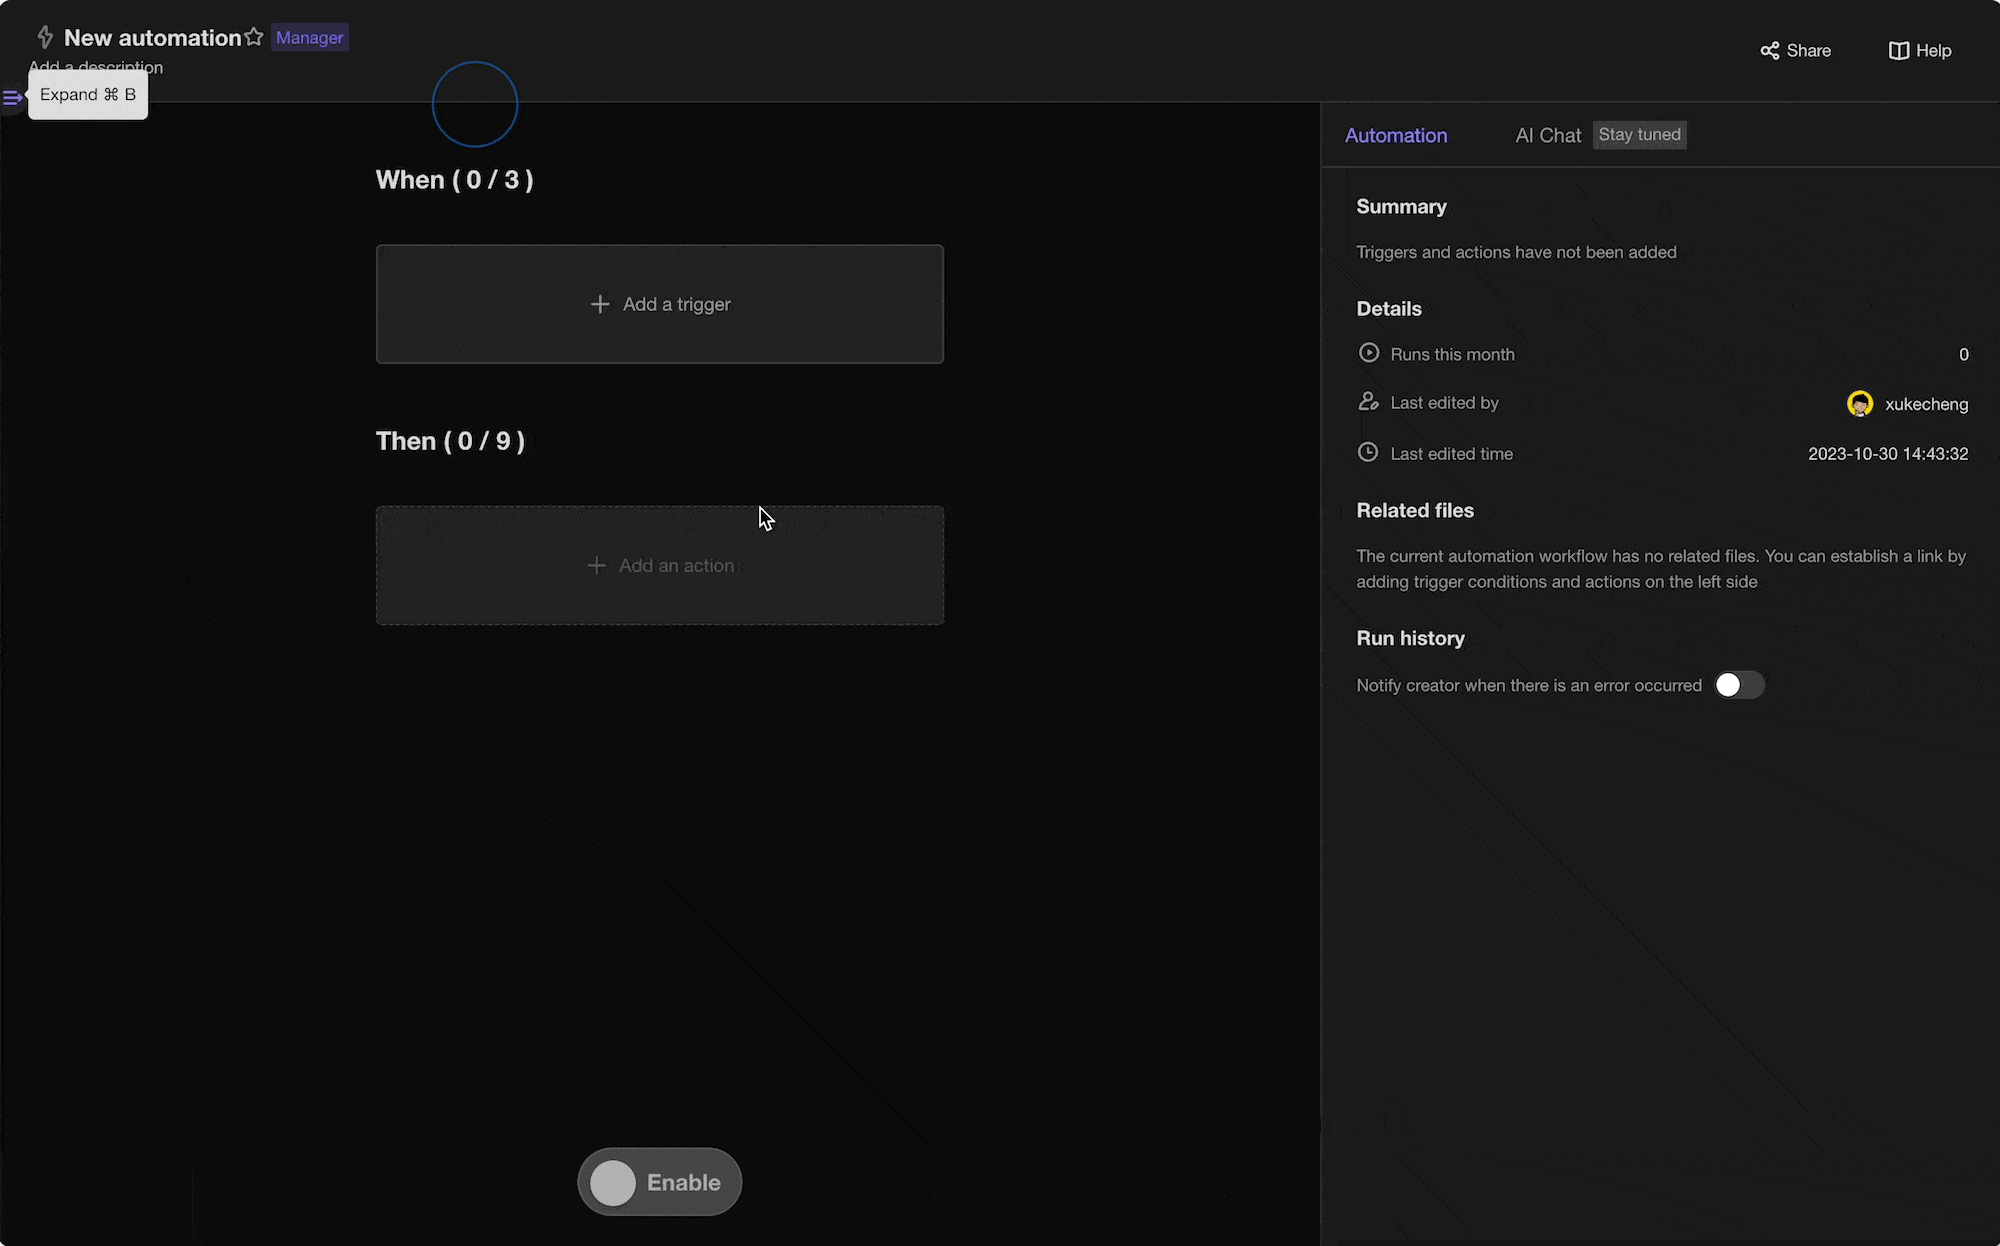
Next, you can add actions that are required for the automation.
Click to view more configuration information:
🗃️ Triggers
4 items
🗃️ Actions
3 items
Step 3: Enable the automation
Once you have configured and saved the triggers and actions, the final step is to enable the automation.
FAQs
FAQs about Automation Creation
1. Can others modify the configuration of the automation I created?
The automation node's managers can modify all configurations of the automation. Editors can modify the workflow and view execution history. Updaters and Readers can only view execution history.
2. How many automations can a single workspace support?
A space has no limit on the number of automations, but it's subject to the maximum nodes limit of the space.
3. How many triggers and actions does a single automation support?
Each automation supports 3 triggers and 9 actions.
4. If I created an automation but later got my permission downgraded, will my automation still work?
Yes, it will still work as normal.
FAQs about Automation Use
1. I set up the trigger condition for automation as "Record matches conditions", where the condition is to send email when the value of a formula field equals "Yes". However, the automation keeps getting triggered without manual intervention. Why?
The auto-triggering likely happens because the formula field references other fields, and when values of those fields change, it triggers the automation. Currently automation does not support triggering only when the value of the formula field changes. So auto-triggering can occur.
Therefore, it's recommended not to use smart formula fields as conditions for automation triggers. Use other field types as conditions instead.
2. I set up multiple triggers with different datasheets in one automation. What if some triggers are not activated? Will the variables from those triggers still be valid? Or cause errors?
For example, John sets up two trigger conditions in an automation:
- When a new record is added to Table A
- When a record in Table B matches conditions
The two triggers use different tables. When Table A has a new record but trigger 2 is not activated, John can still use the variable from trigger 2 in actions. The system won't error out, the variable value will just be empty.
If you want to avoid empty variable values due to inactive triggers, consider using trigger conditions associated with the same table within one automation node.
3. How do I know which triggers are activated and which are not?
The execution history will show the activation status for each run. You can clearly see which trigger condition was met to activate the automation.
Automation Management
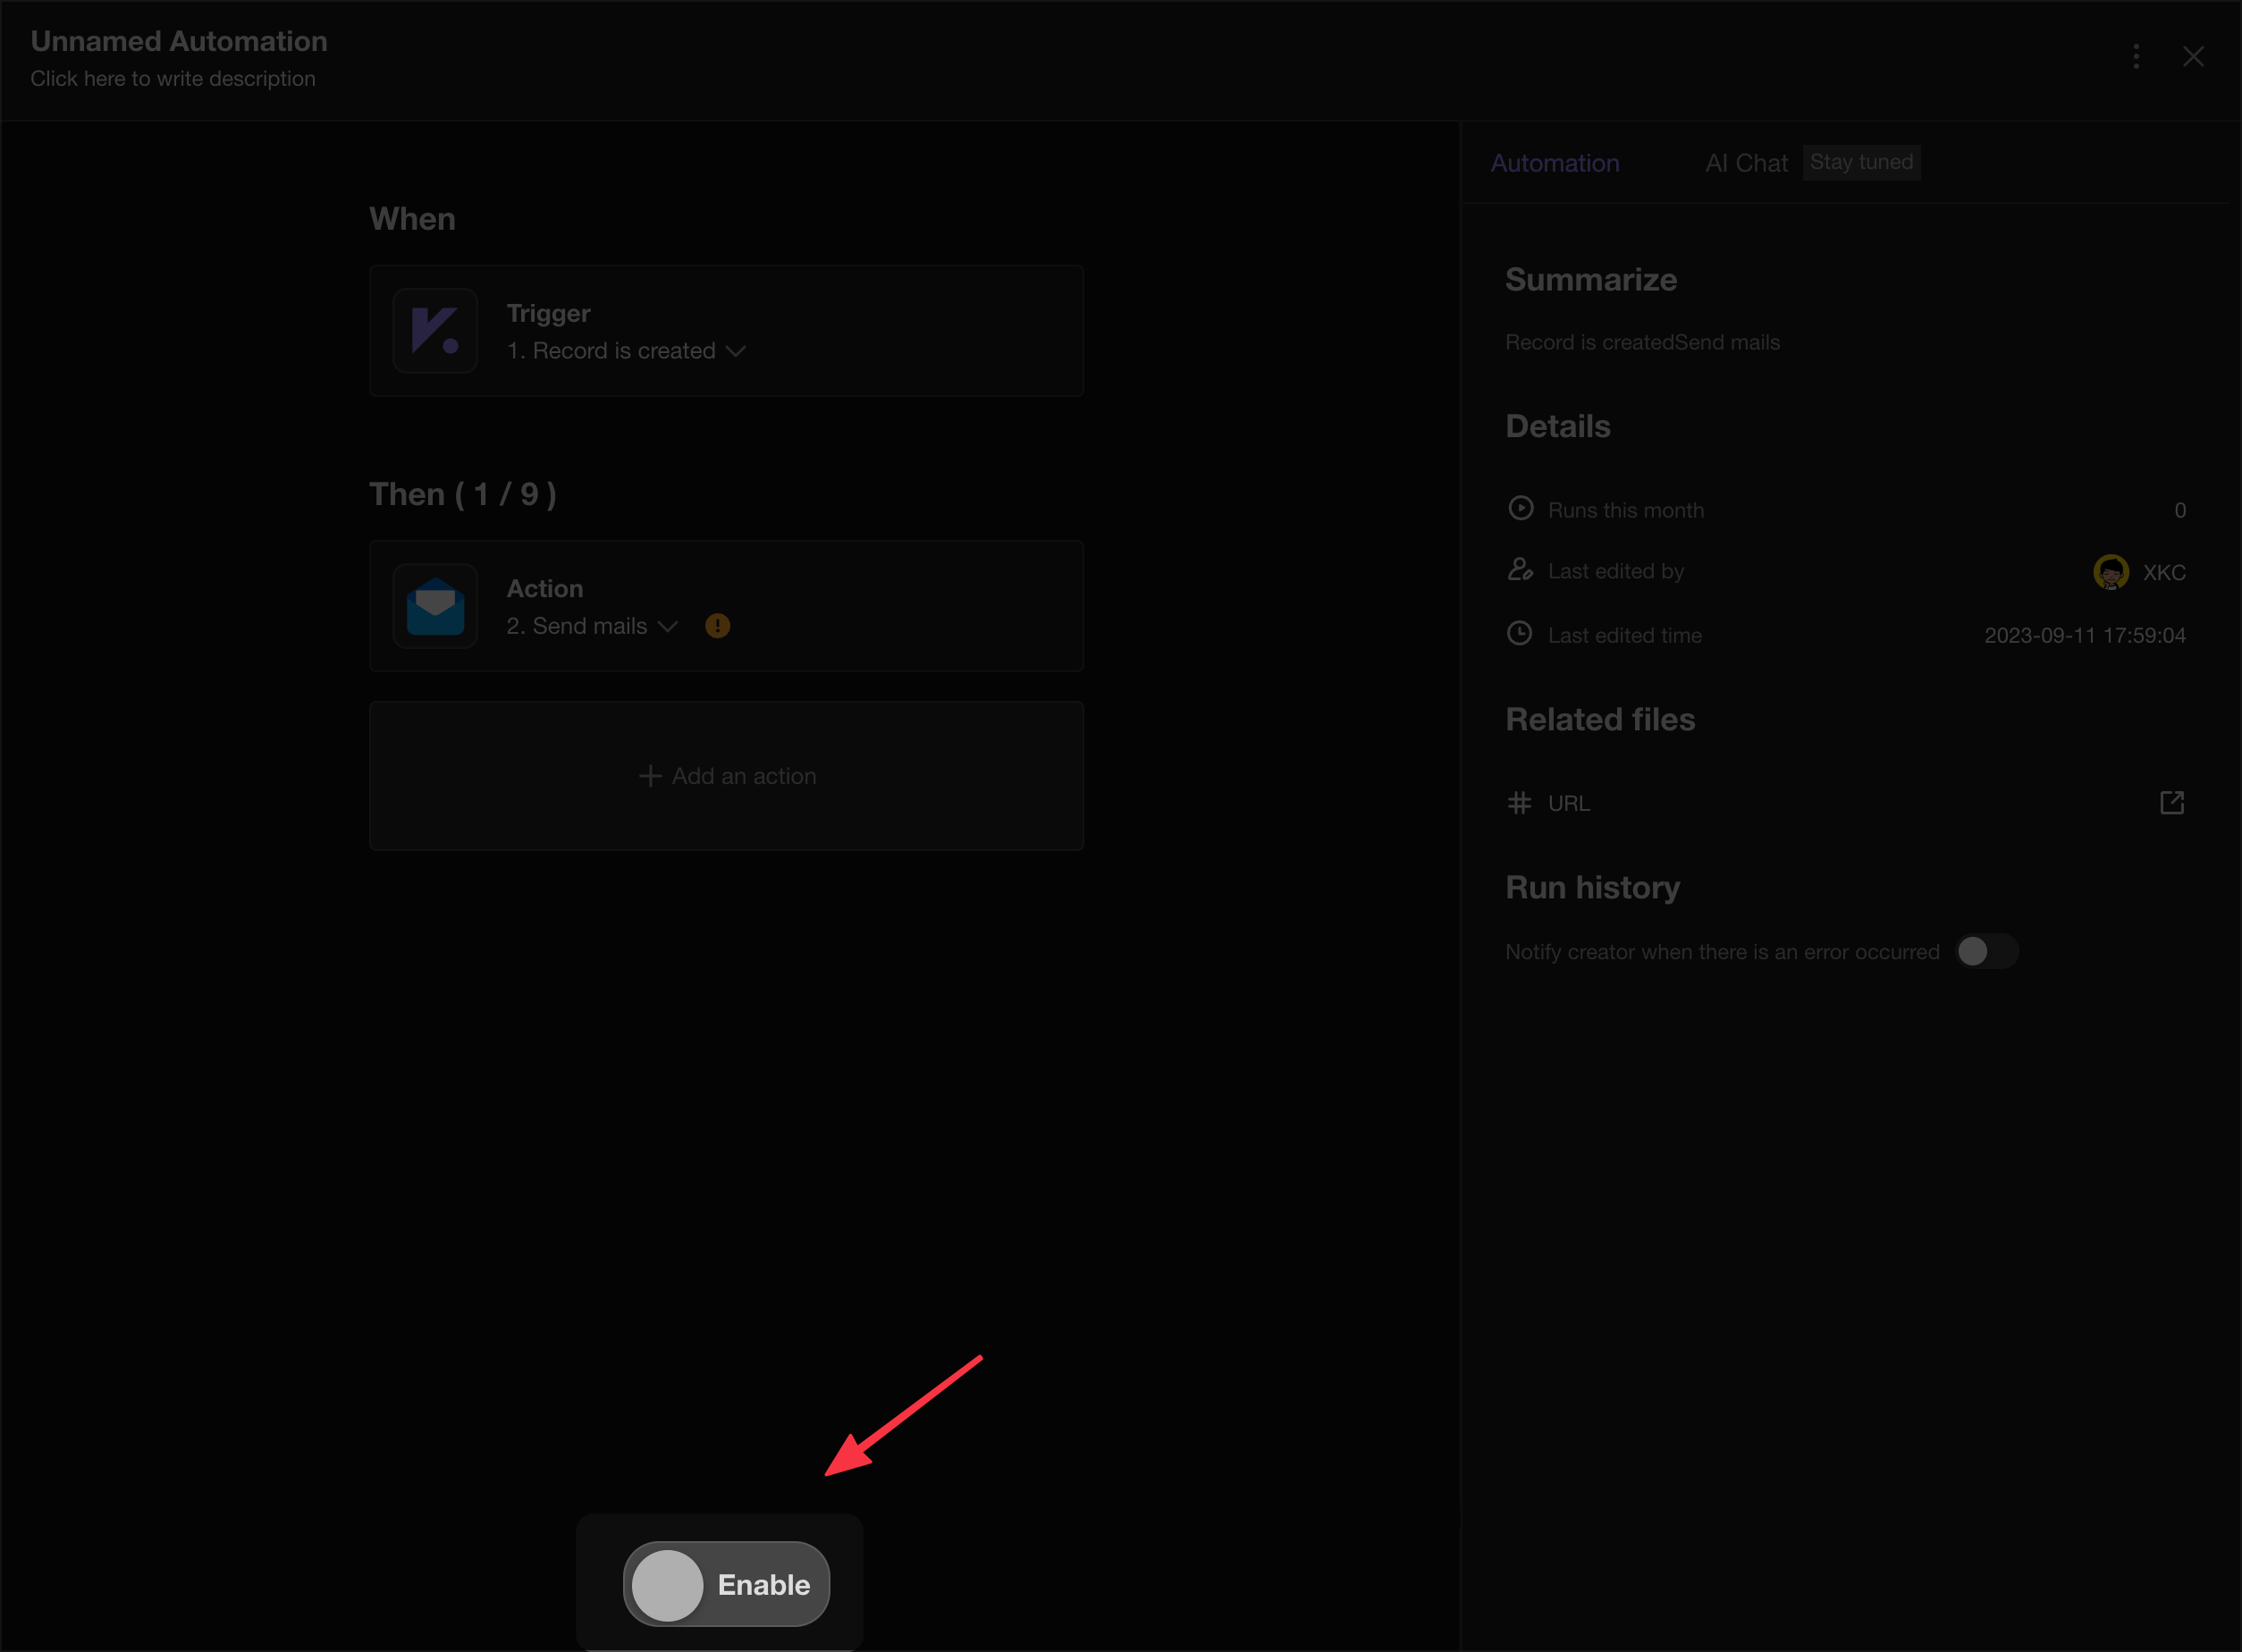
How to troubleshoot?
To access the running history panel, click on the icon as shown below. The panel records the running history of the past two calendar months, capturing successful runs, failures, and ongoing tasks.
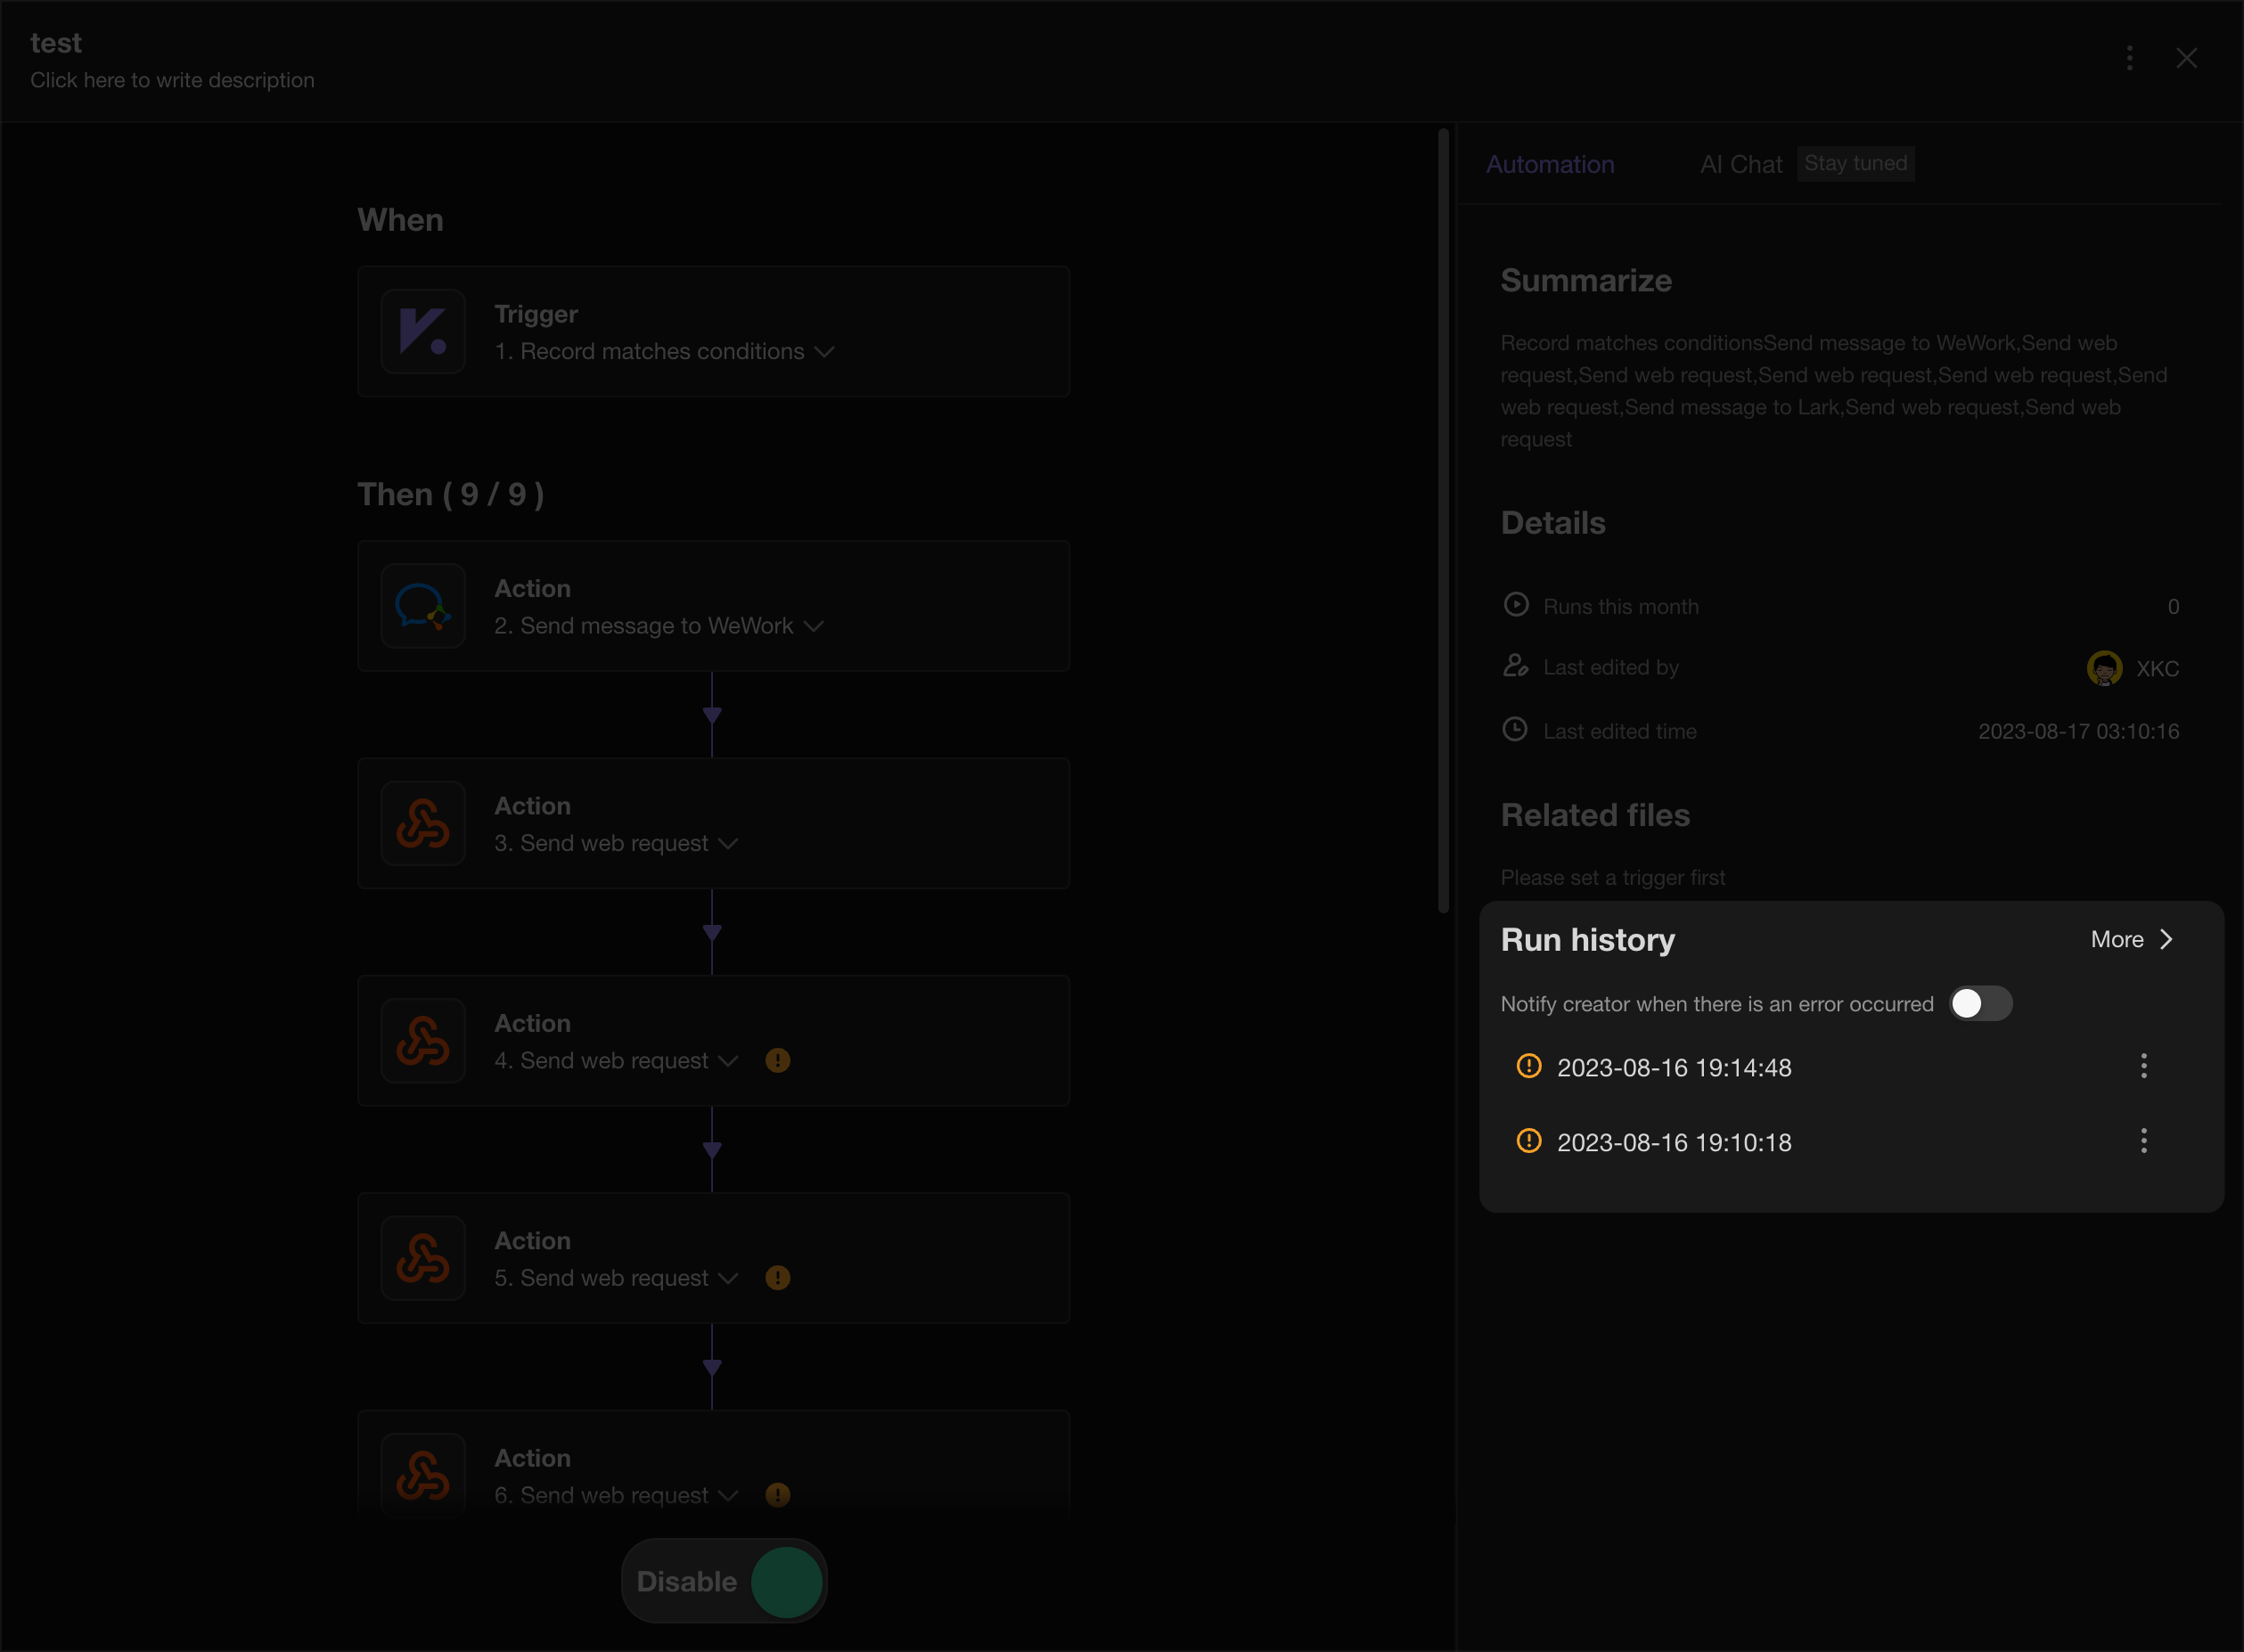
For each "successful" and "failure" run, expand the operation details to view the input and output at each step. In the "Run Failure" history, examine the server-provided error message to identify issues at specific steps.
Here are some common error situations:
400 Bad Request - This indicates that the server cannot understand your request. Please check if the request format and parameters are correct.
401 Unauthorized - Authentication failed or the user does not have permission to make the request. Please confirm your authentication credentials are formatted correctly.
403 Forbidden - The server refused authorization. Please confirm your authentication credentials are formatted correctly.
404 Not Found - The requested resource cannot be found on the server. Please check your request format and parameters.
408 Request Timeout - The server timed out waiting for the request. Please check your network connectivity.
500 Internal Server Error - The server encountered an error and could not complete the request. Please check request format and parameters or contact who configures this.
502 Bad Gateway - The server received an invalid response from another server. This is usually a server configuration issue. Please contact who configures this.
503 Service Unavailable - The server is temporarily unable to handle the request, possibly due to overloading or maintenance. Please retry later or contact who configures this.
What to Do If Your Error Is Not Listed?
If you encounter an error that is not covered in the above list, you have two options:
Online Search: Use the error message or code to search for a solution online. Many issues are common and have been addressed in forums or documentation.
Join Our Discord Community: For more personalized assistance, join our Discord server where you can ask questions and get help from the community and our support team. Discord Link: https://discord.com/invite/q6RzxjyvYV