Introduction
This document provides instructions on how to quickly set up an AI Agent and explains the main features available in the chat user interface.
Getting Started with Video
Before we begin, here's a demo video on the QA Agent (Please note that due to iterations, the actual interface and functionality of the product may differ from what is shown in the video).
Create a New Agent in 3 Steps
To create a new Chat Agent, follow these simple steps:
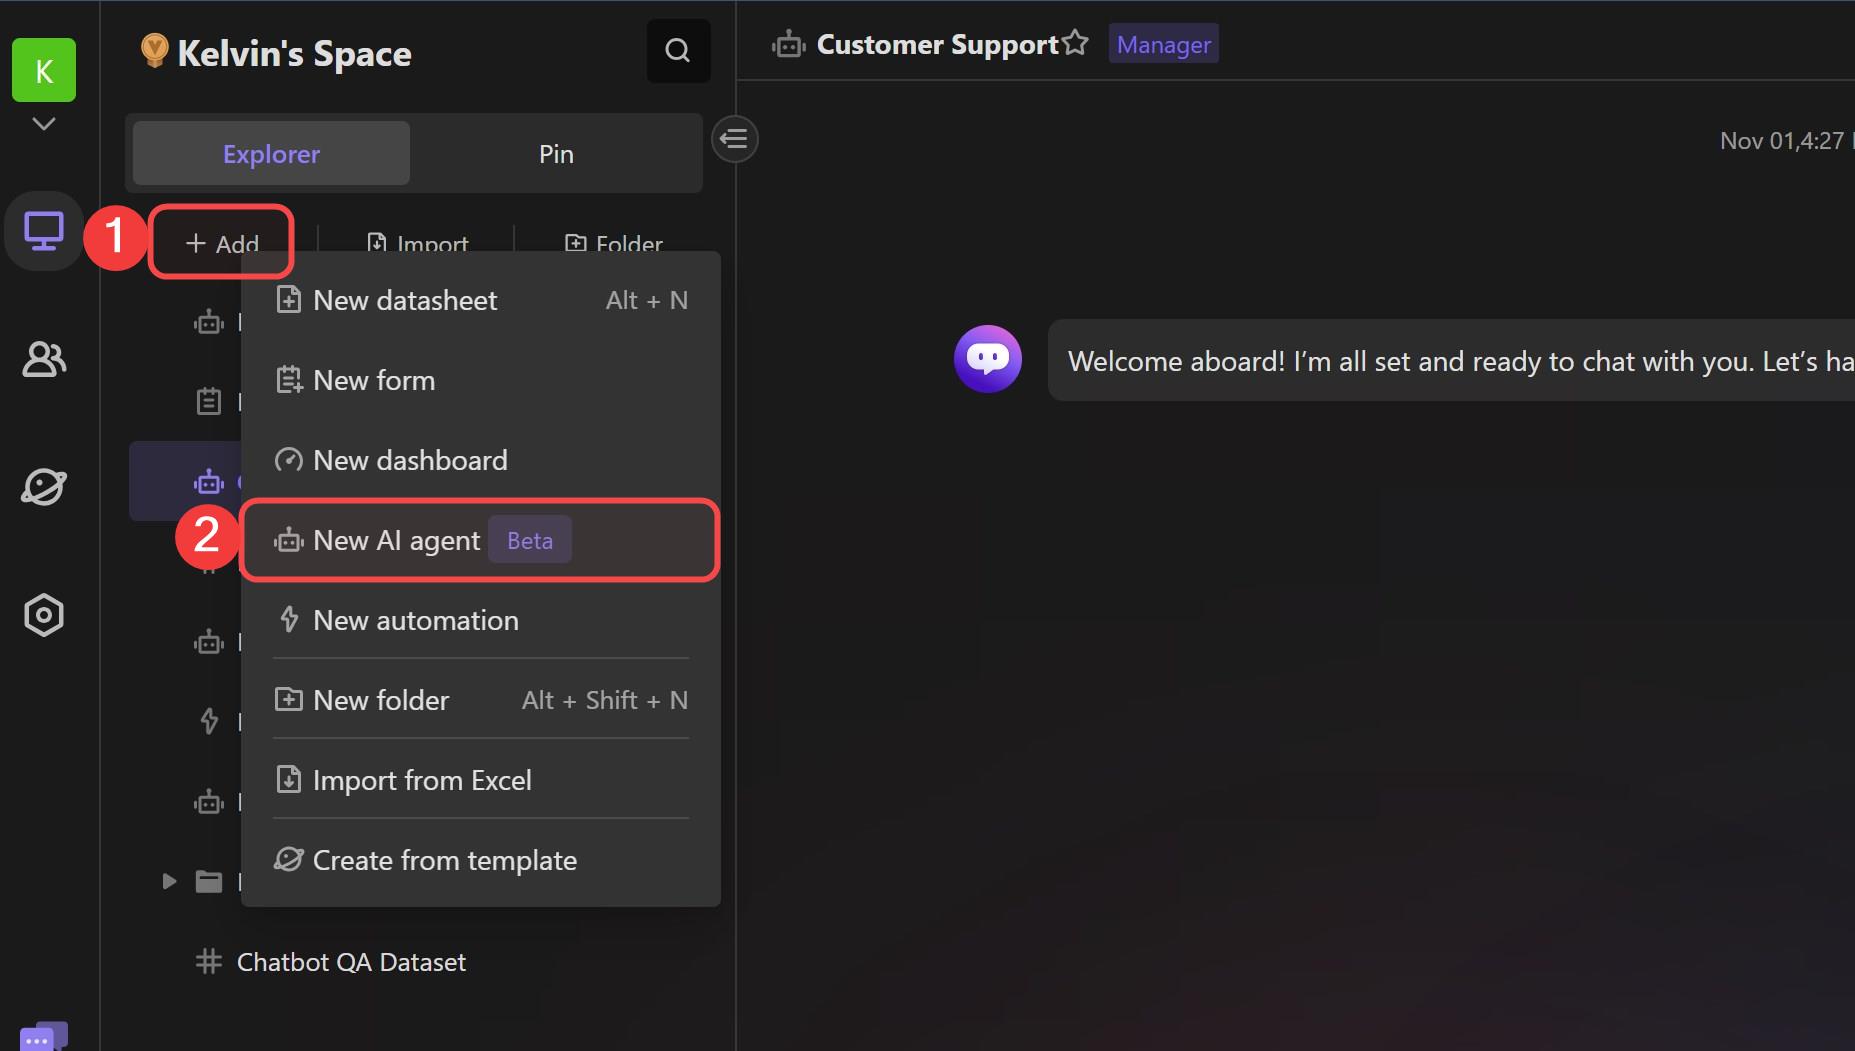
- Access workbench, and click on the "+" button in the upper left corner. This will open a menu where you can find the option "New AI agent". Click on it.
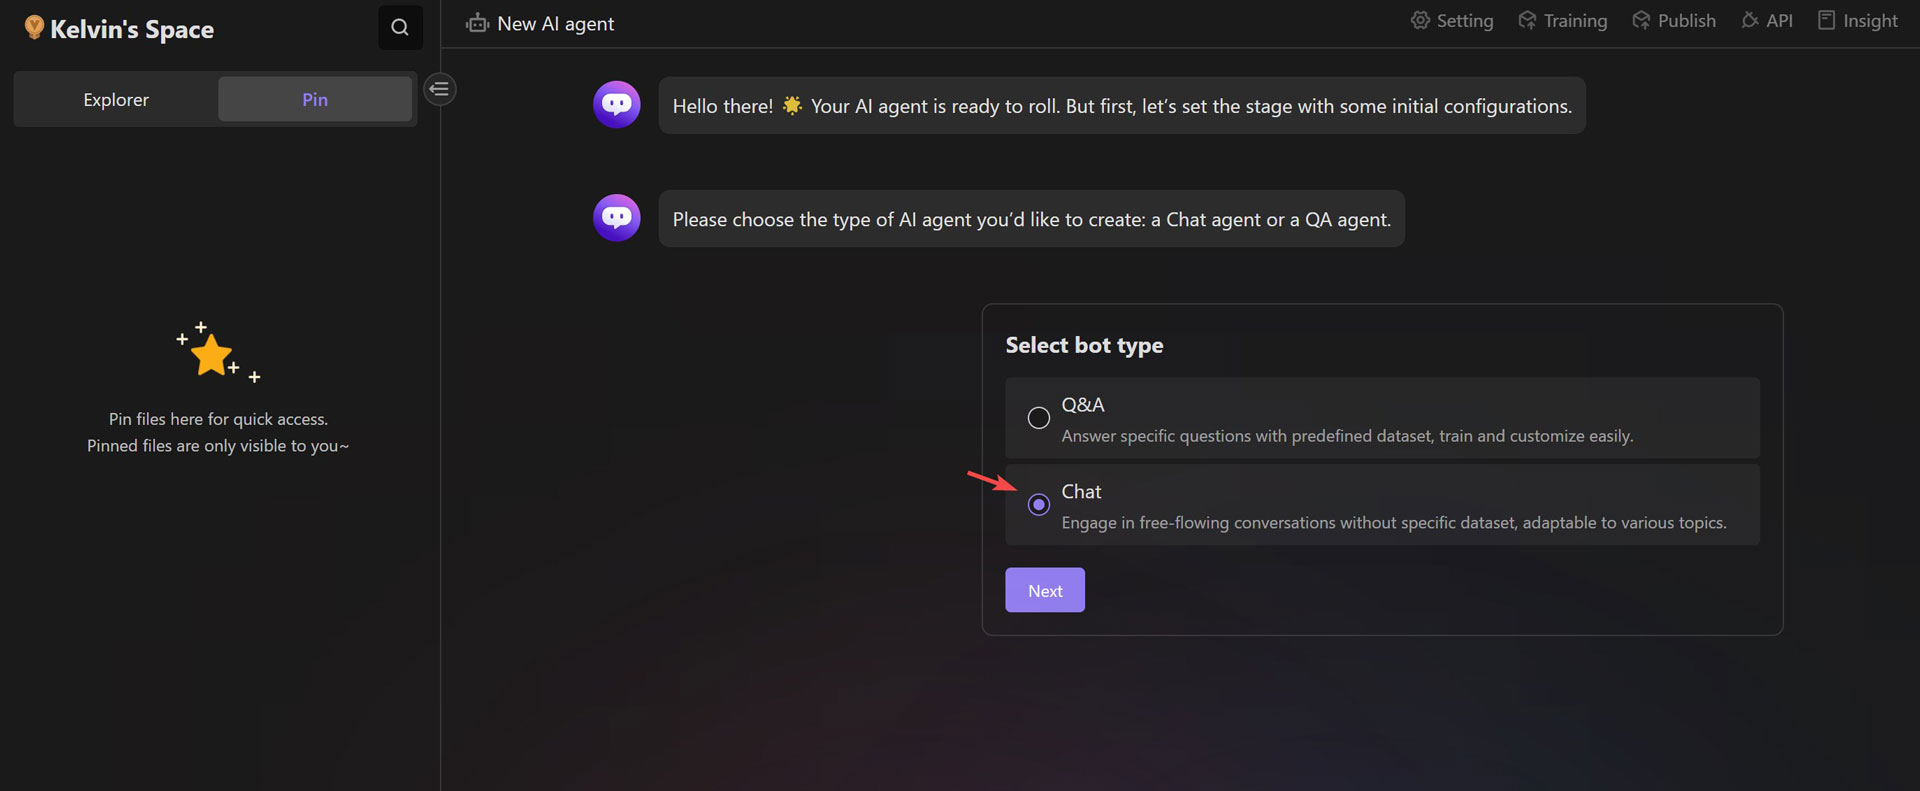
- You will be directed to the "Create AI Agent" wizard, which will guide you through the setup process step by step. In the wizard, you will be prompted to choose the appropriate settings. Start by selecting "Chat" as the agent type from the radio menu.
- Complete the agent creation process by following the instructions in the wizard. Please note that the steps may vary depending on the type of agent you are creating. For more detailed information, refer to the corresponding agent's help documentation.
User Interface Overview
The AI Agent's User Interface consists of three main components:
At the top of the user interface, you will find the agent's name. To the top right, there are options such as "Settings," "Training," and "Publish" that provide access to various functionalities.
The central area is the main chat conversation area between the human and the AI.
The bottom section is the user input area. Users can enter commands or ask questions in this area. By clicking on "New Chat," a new conversation can be started.

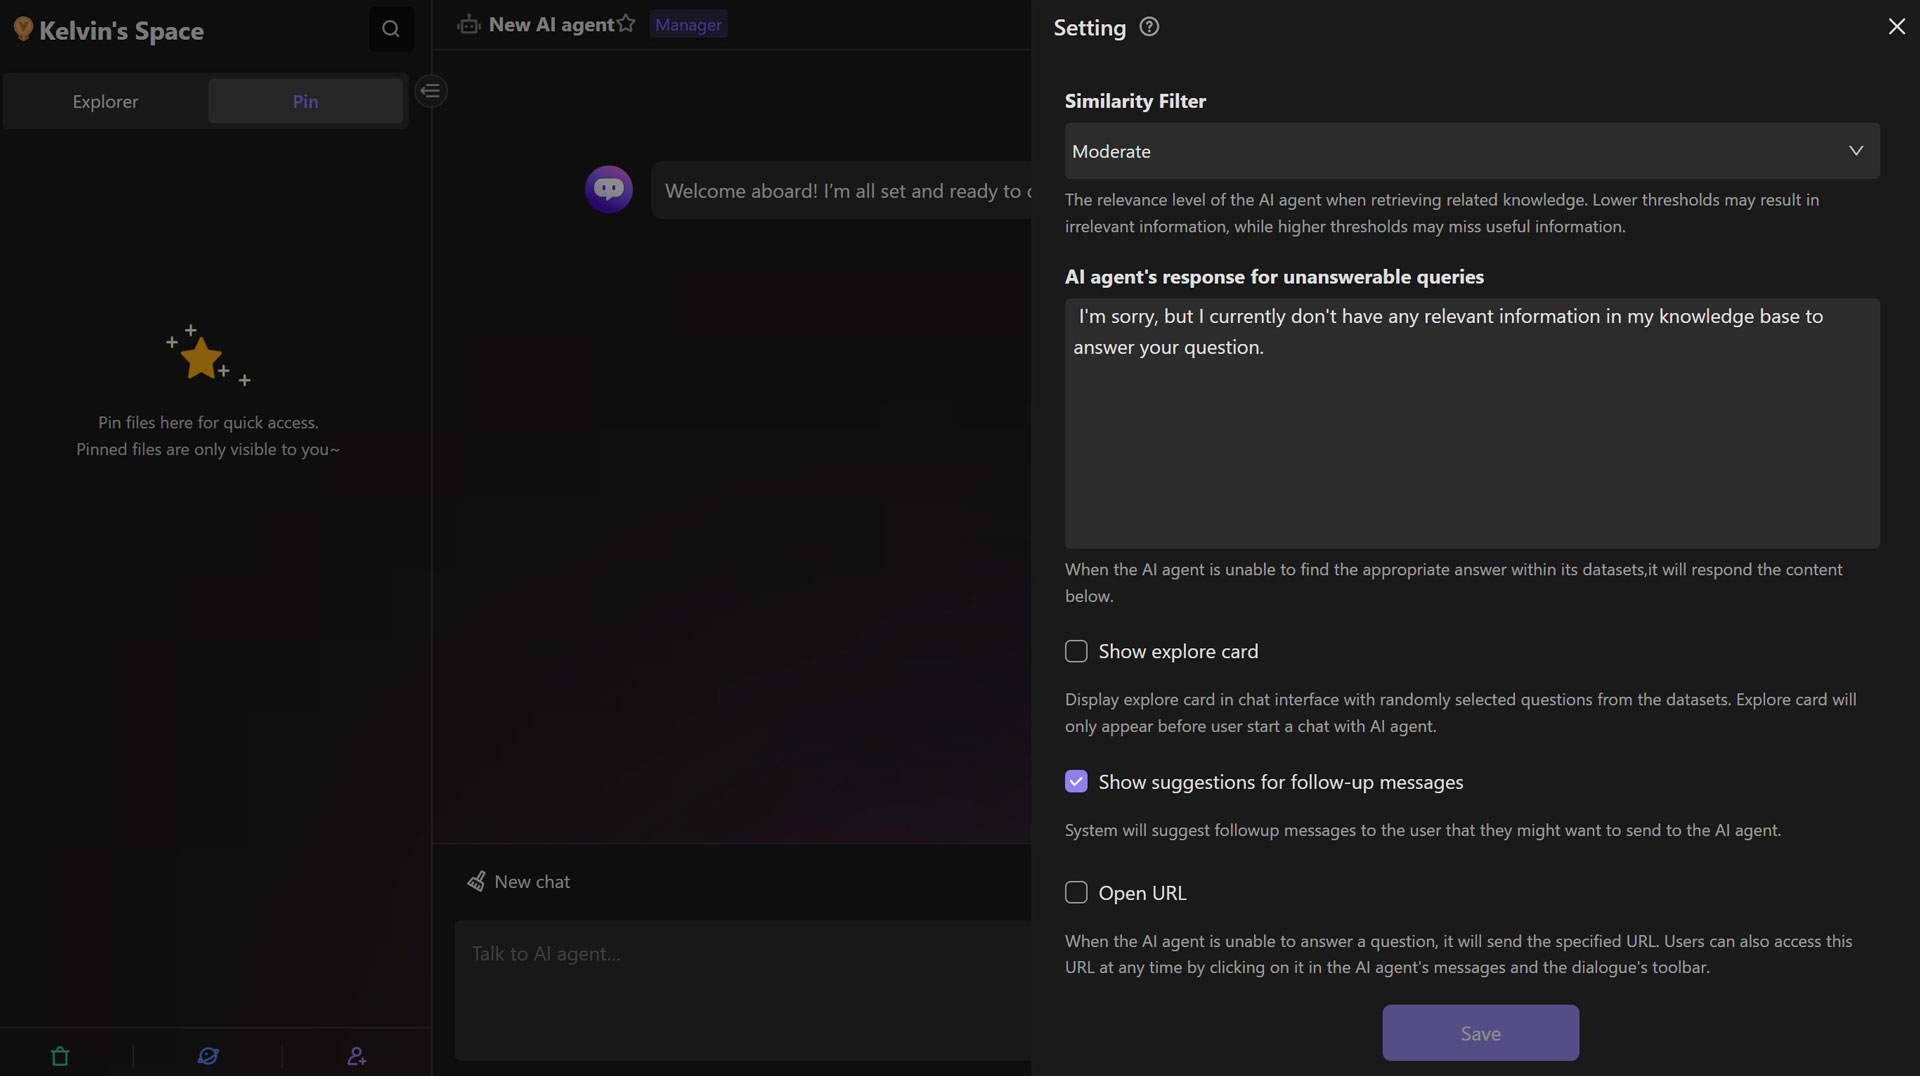
Setting Panel
The AI Agent's settings panel provides a wide range of configuration options that are relevant to the current agent type. Users can customize these settings according to their specific business requirements. For example, some common configuration options include "prompt", "Opening remarks", "temperature" and so on.
Training Panel
The training panel in the AI Agent is specifically designed for managing the training dataset of the agent. Currently, it is only available for agents of the QA type.
The training data can come from various sources, including:
Datasheet Records: The records in the datasheet can be used as a source of training data.
Attachments: The attachments in fields of datasheet can also be used as data source for training the agent (Currently, only the format of ".pdf", ".md", or "*.docx" files are available for training).
URLs: The AI Agent can utilize all the URLs stored in the "URL" column to crawl web page content and use it as a data source for training. This functionality allows the agent to gather information from various online sources and enhance its knowledge and understanding.
By utilizing these different data sources, users can effectively train the AI Agent and improve its performance in answering questions and providing accurate responses.
- If there are updates to the content in the datasheets and you want the AI agent to be able to retrieve it, retraining is necessary.
- If you retrain the AI agent, all existing feedback messages will be cleared.
For information regarding the pricing of AI agent training, please refer to this AI Pricing.
Publish Modal
Once you have created your AI Agent, it is set to be accessible only to the members of your current Space by default.
However, if you wish to share your AI Agent with users on the internet, you can do so by publishing a "Share Link" in this modal window. Additionally, after publishing the public link, you will also receive an embedding link for your AI Agent. This allows you to seamlessly integrate your carefully crafted AI Agent into various web pages.
Insight Panel
Feedback
As an AI Agent manager, you have access to the Insight panel, where you can view and handle all user feedback and ratings on the AI Agent's response messages.
The Insight panel allows you to monitor and analyze these user ratings, gaining valuable insights into the effectiveness and user satisfaction with the AI Agent's responses. This feedback can help you identify areas for improvement and make informed decisions to enhance the performance and user experience of the AI Agent.

Conversation Log
Furthermore, there is a feature called Conversation Log that allows administrators to gain deeper insights into customer needs. This feature provides detail information of interactions between users and your AI Agent, enabling a better understanding of customer requirements.
History Panel
To access your previous conversations with the AI Agent, click on the "History" button in the chat window. This will open a new panel displaying all of your past interactions.
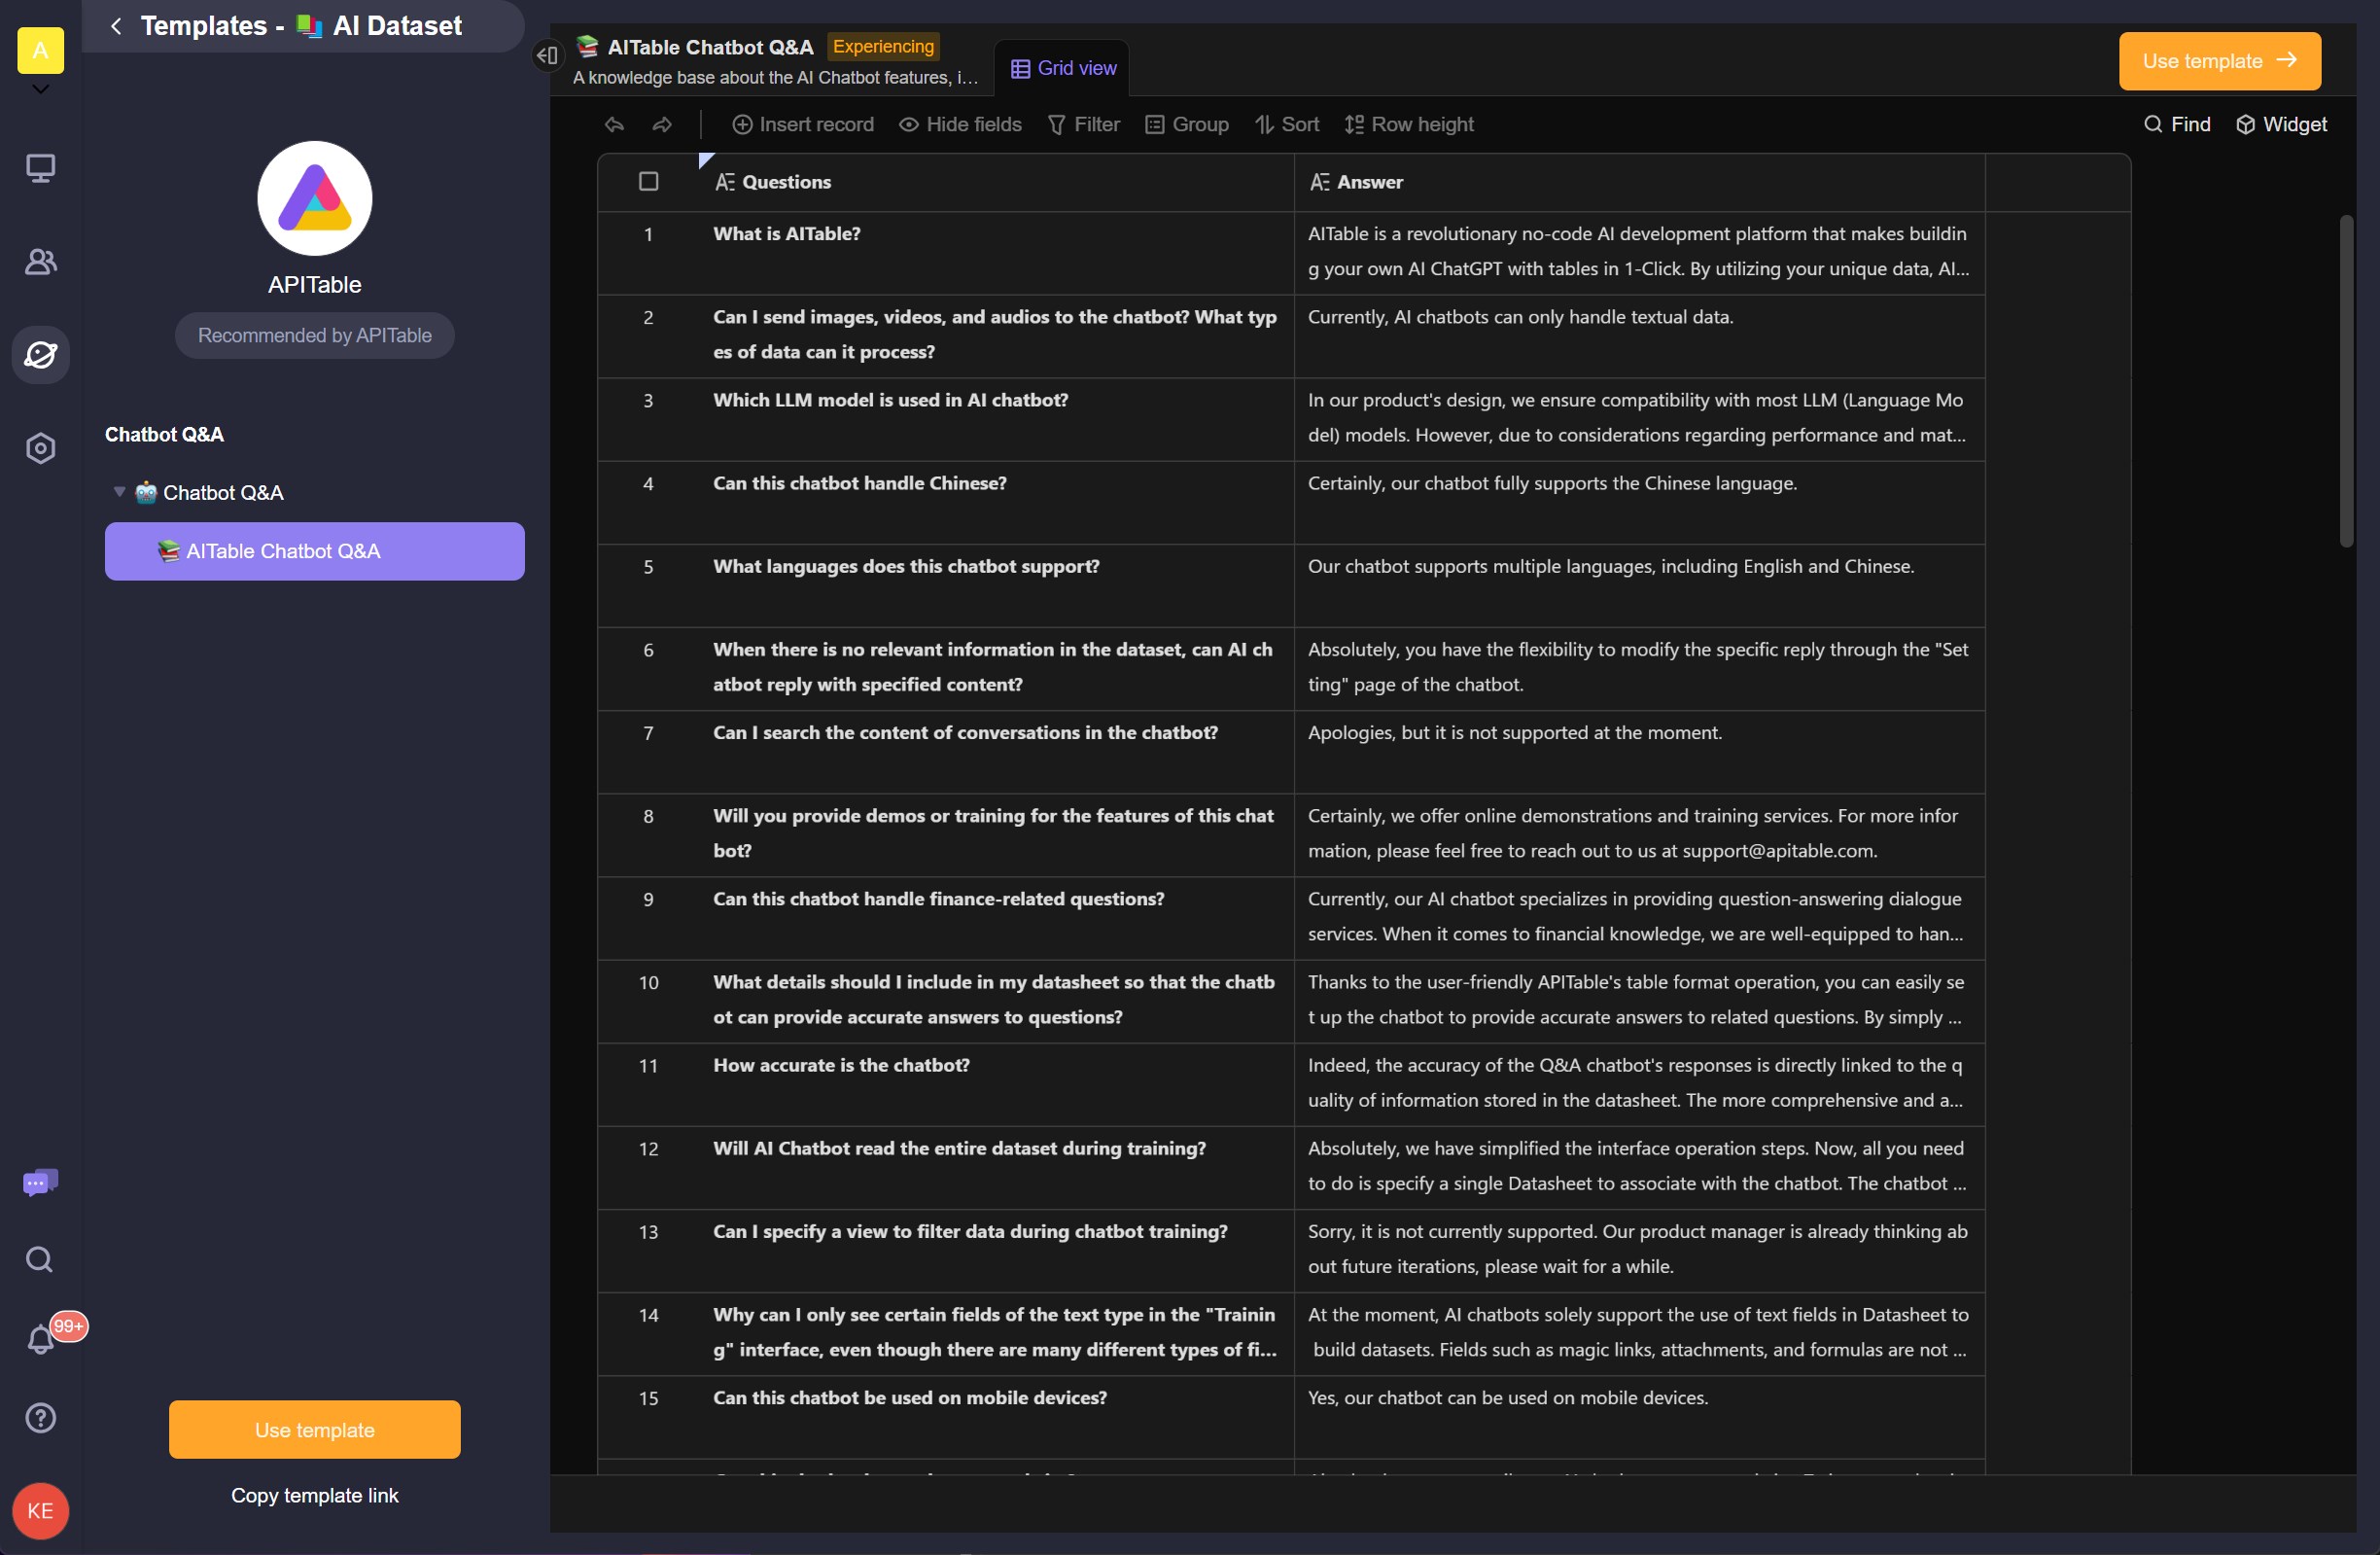
Q & A
We've compiled all the common questions related to the AI agent into a datasheet. You can access it by clicking here.
You can also save it to your own workspace and use it as a dataset to experience the AI agent quickly.