Embedding AI agent
AITable offers two ways to embed AI agents into websites such as WordPress and Wix. For example, you can create a Question-answering AI agent to quickly address user inquiries about website or product usage.
Additionally, you can teach an AI agent sales scripts, product pricing, and lead generation, and then embed it as a plugin on your webpage. It will appear as an AI customer service agent in the bottom right corner, providing 24/7 online assistance to visitors on your website.
How to embedding AI agent
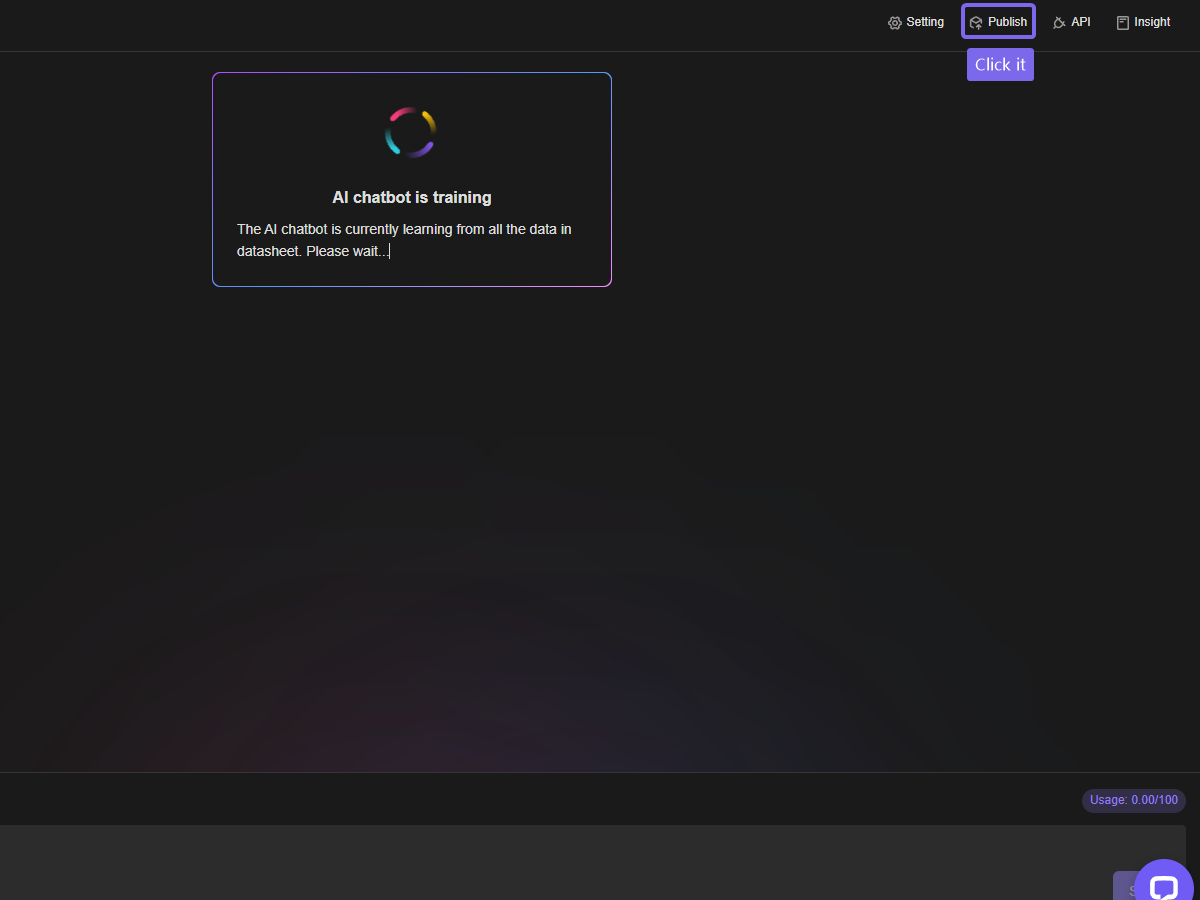
Step 1: Publish AI agent
Before embedding your AI agent, ensure that it has been published. Only published agents can be public accessed by users on the internet. To publish your AI agent, follow these steps:
- Go to the AI agent page.
- Click on the "Publish" button located in the upper right corner of the page.
- This will open the public settings for your AI agent.
By publishing your AI agent, you make it available for users to interact with on your website or other platforms.
Clicking on "Publish" in the pop-up window.
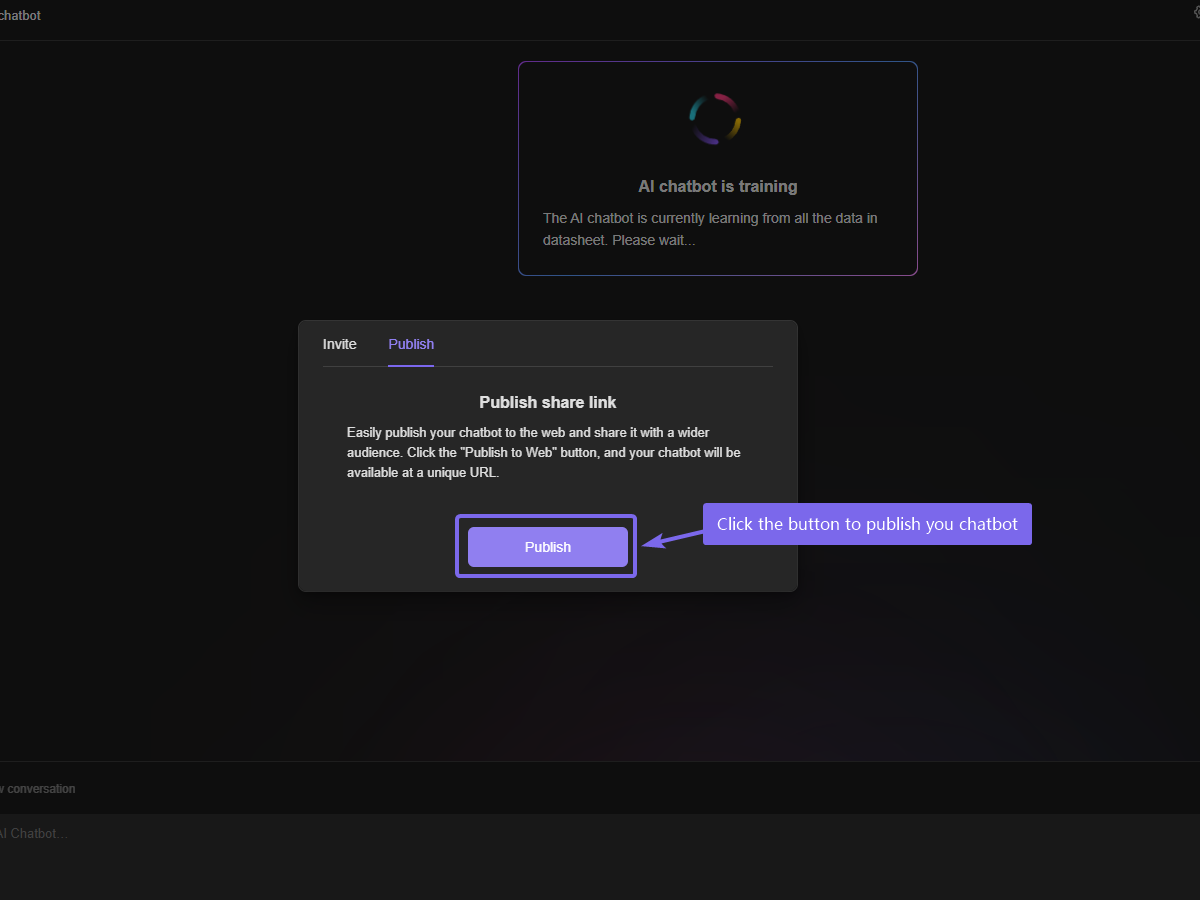
Now you will receive a public link that all internet users can use to access the AI agent.
Step 2: Inserting the Embedding Code
To incorporate the AI Agent into your website, you need to copy and paste the embedding code. Follow these simple instructions:
Click on the "Embed" button to reveal the embedding code.
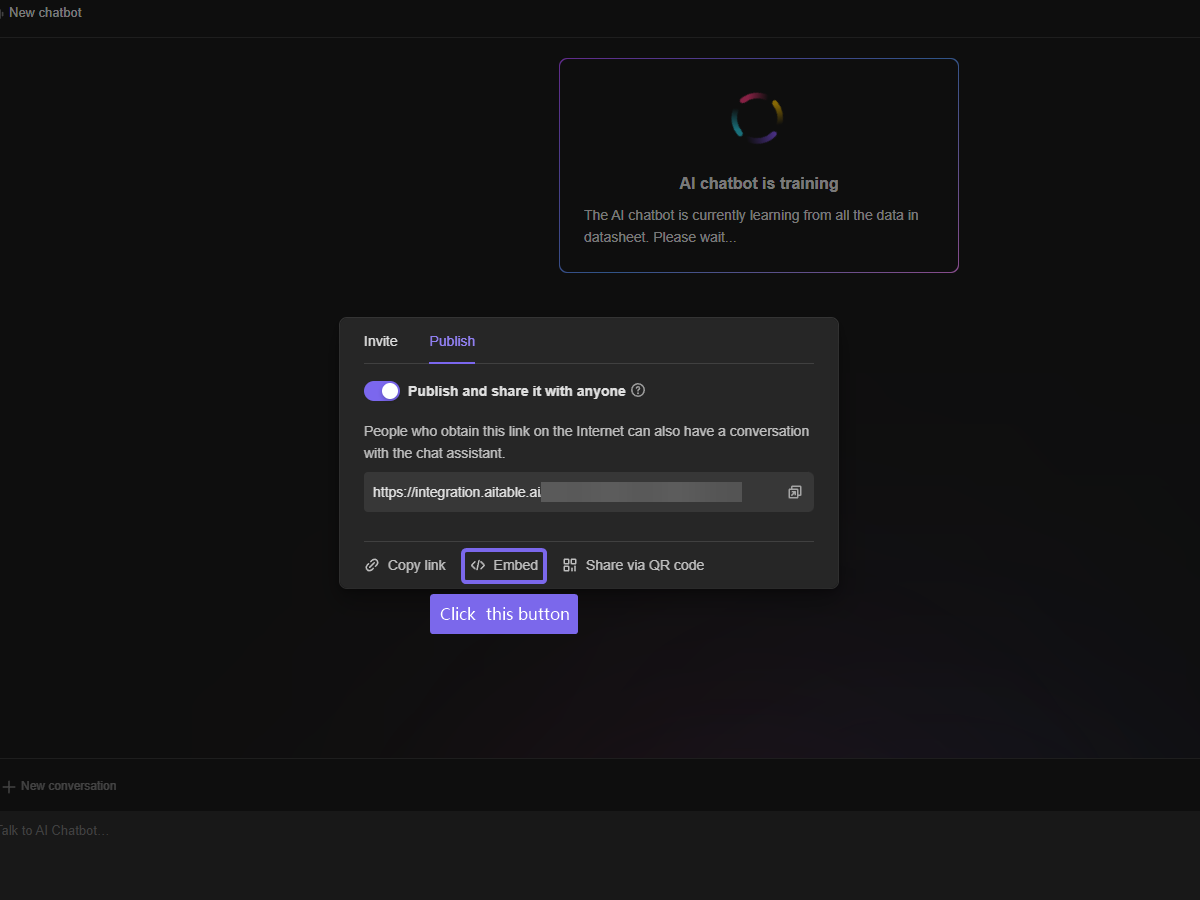
The embedding code will be generated in both HTML and JavaScript formats, based on the AI agent ID. Choose the code that suits your needs.
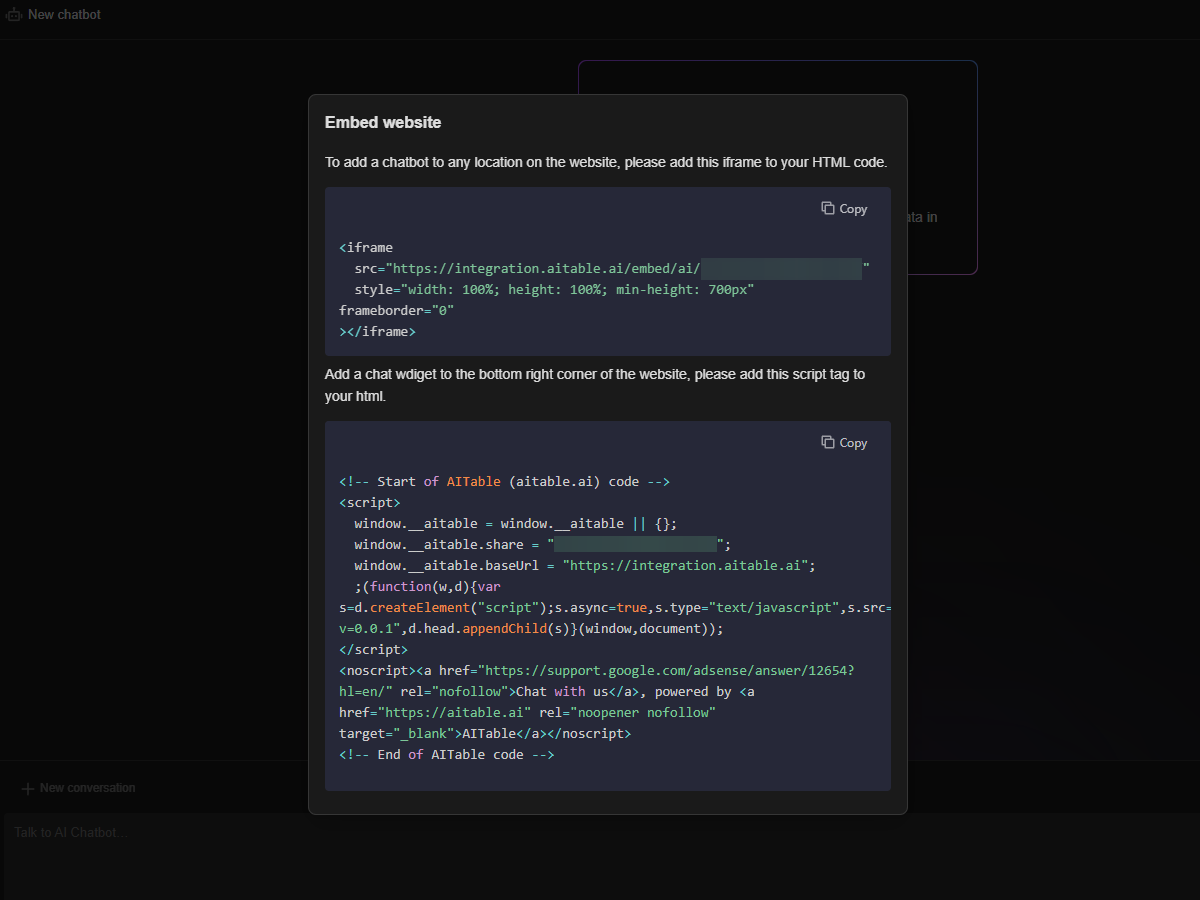
If you prefer to use an iframe, which is an HTML element that allows you to embed another HTML document within your current document, simply insert the code into the HTML page of your website. This method provides a straightforward integration of the AI Agent.
👇Use case: embed ai agent to webpage
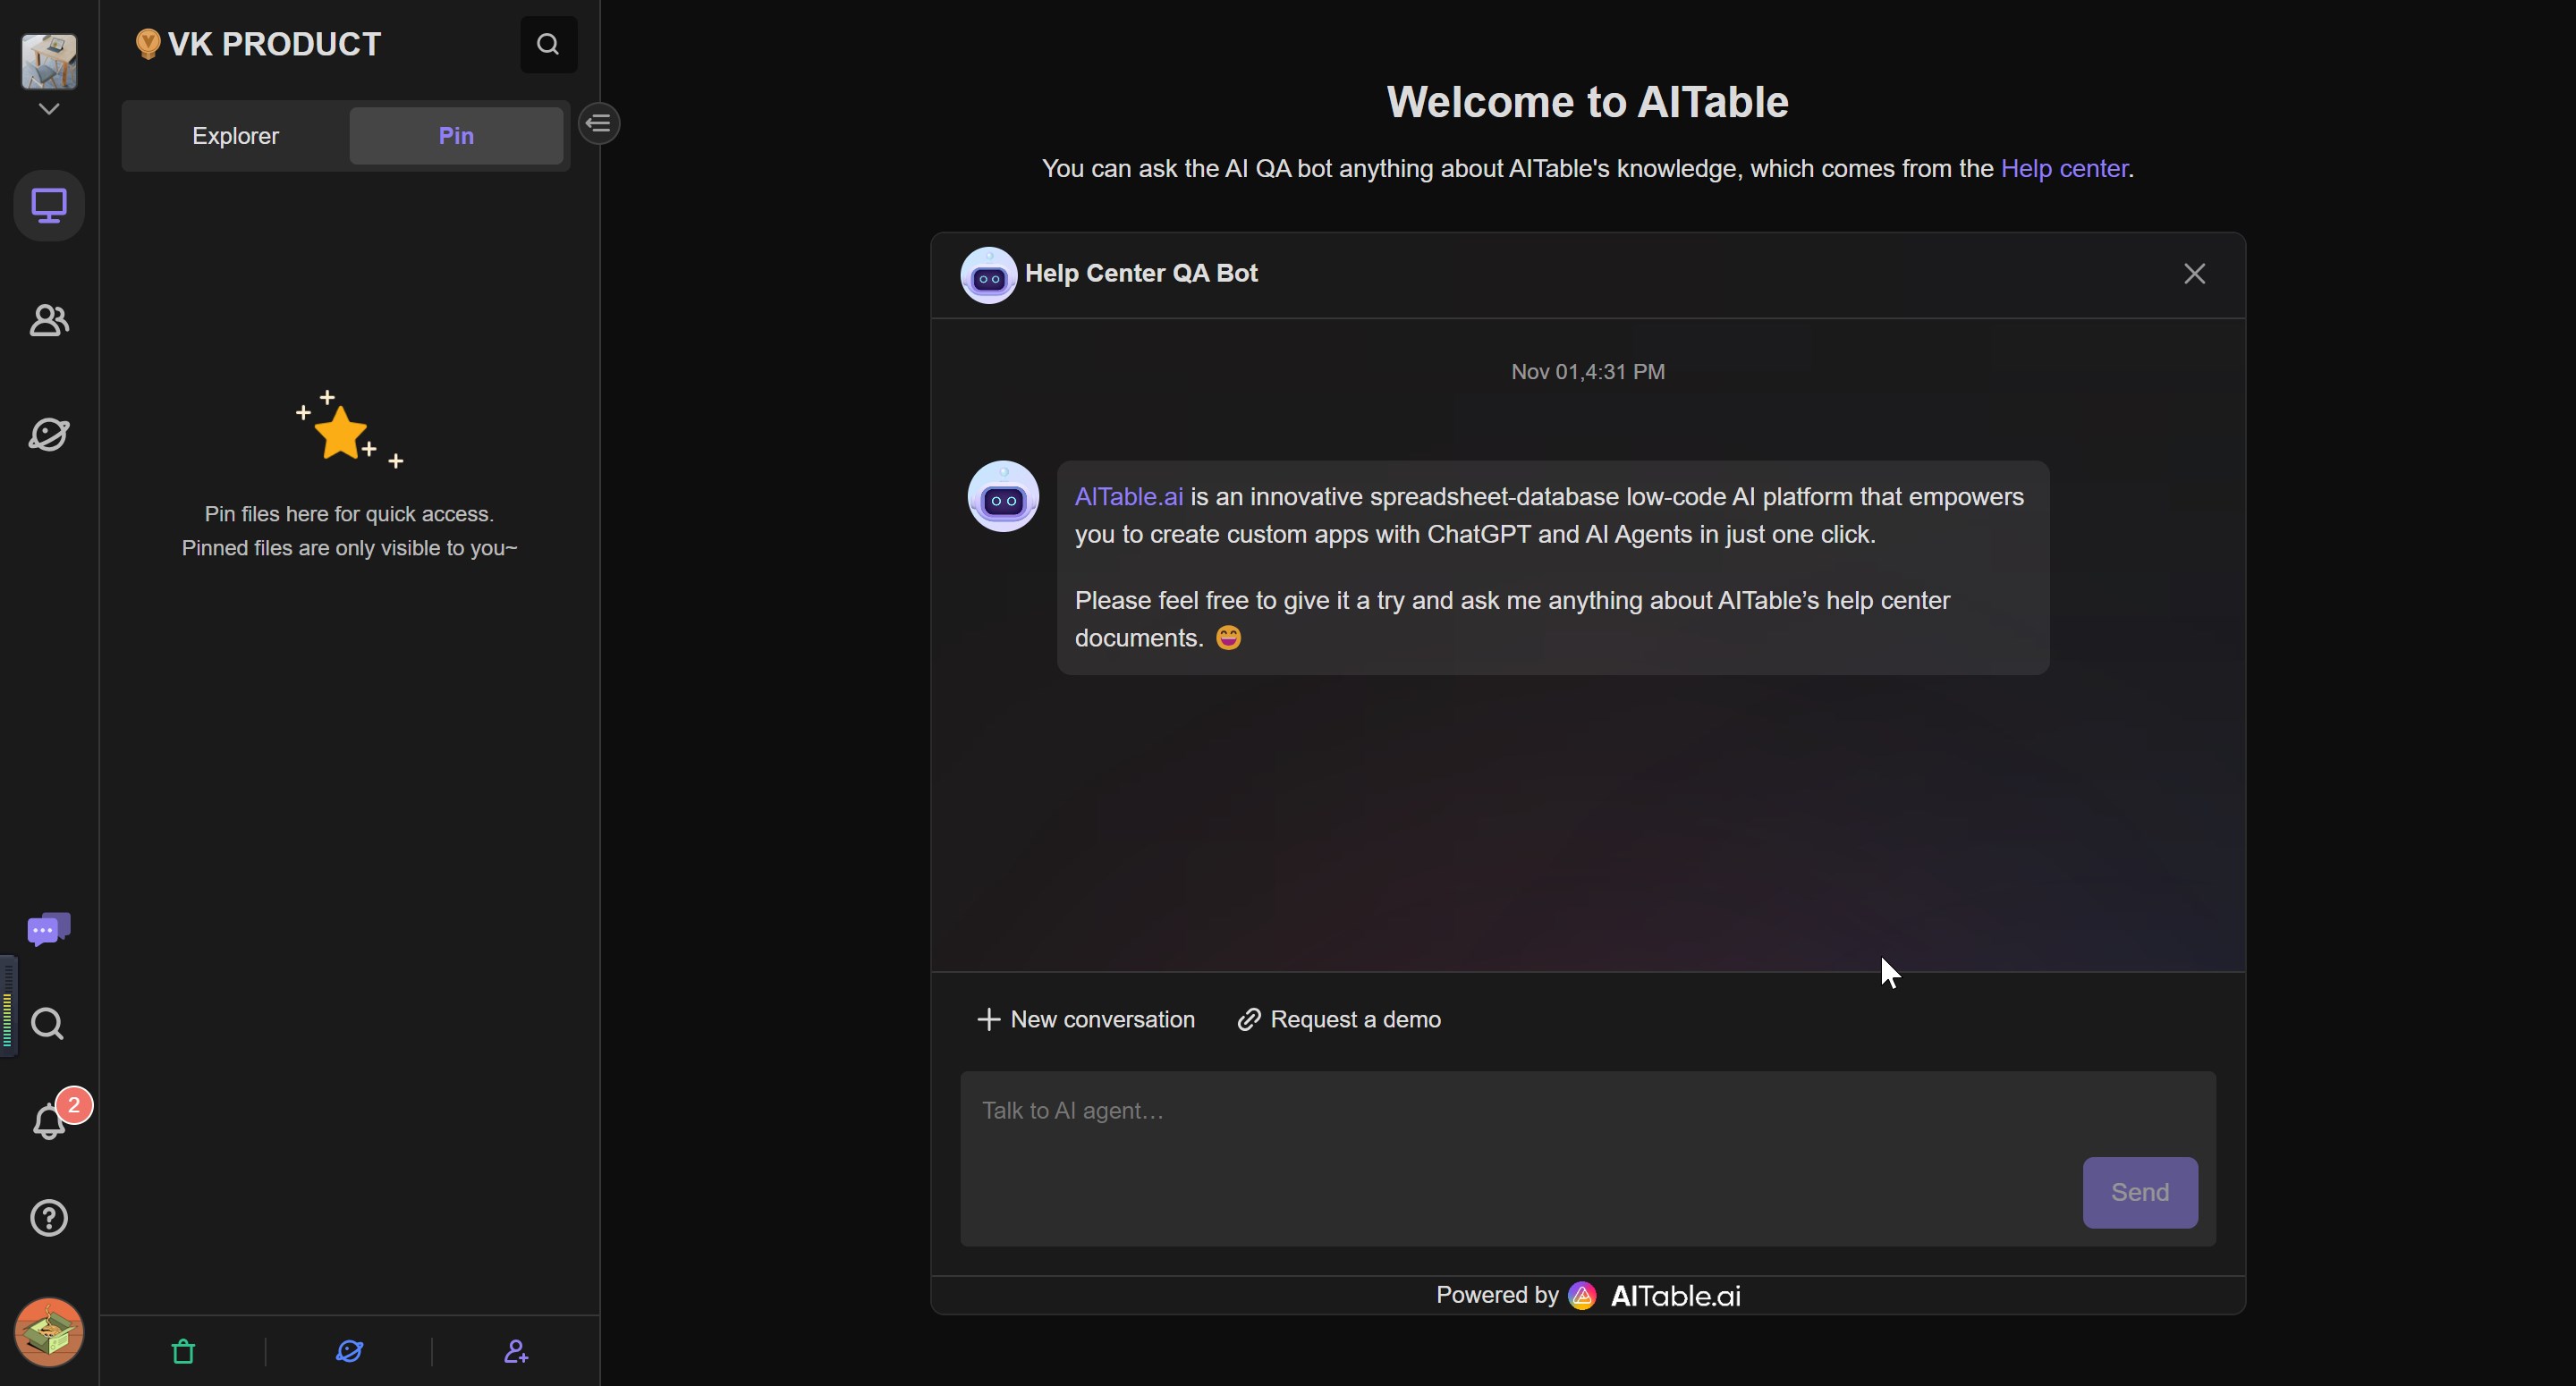
Alternatively, you can utilize the JavaScript method for a more flexible integration. By using JavaScript code, the AI Agent will appear as a floating button in the bottom right corner of your webpage, similar to popular customer support tools. When a visitor clicks on the button, a chat box will automatically appear, enabling them to engage in a conversation with the AI Agent.
👇Use case: The widget of Customer support
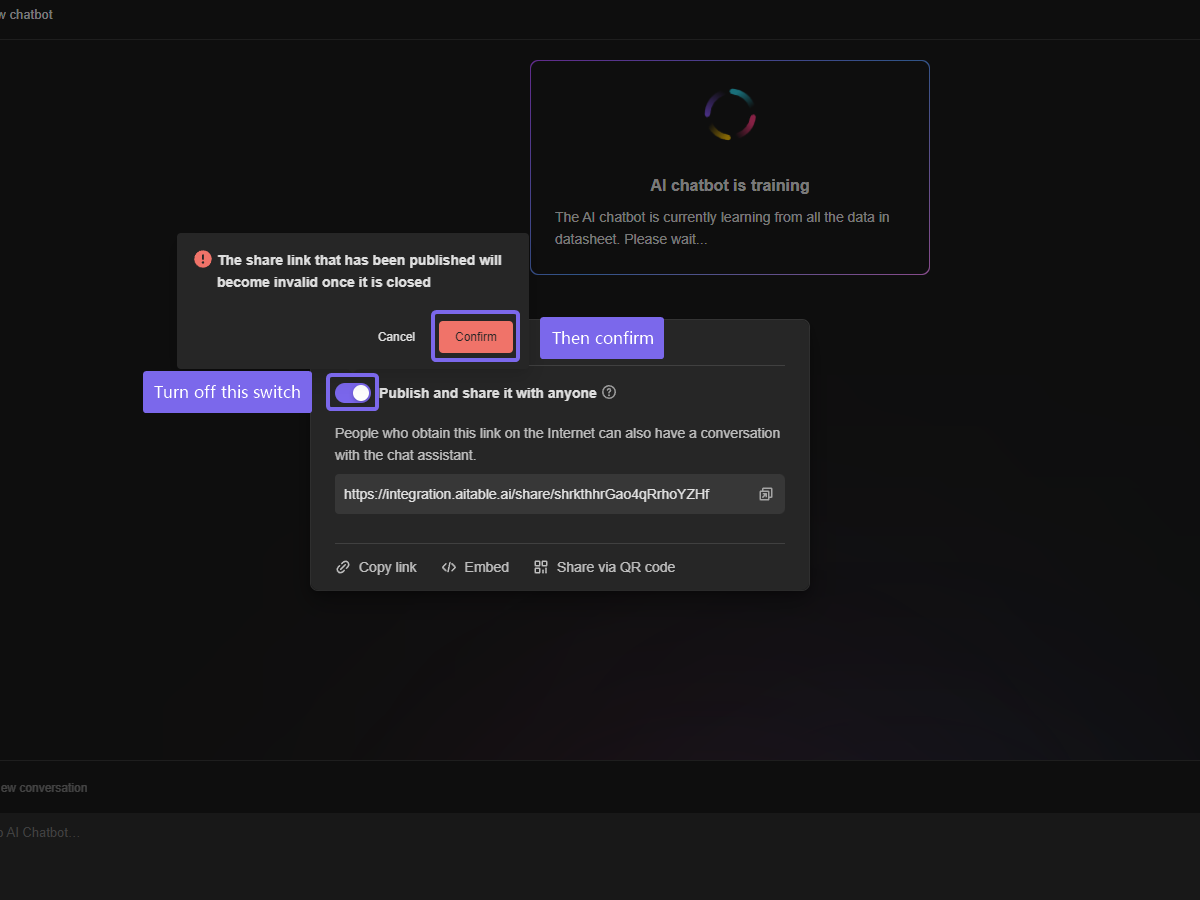
Disabling the Embedding
If you wish to close the public link for the AI agent or deactivate the embedding of the AI agent, you can easily do so by following these steps:
- Open the "Publish" modal.
- Look for the switch associated with the embedding and turn it off.
- Confirm your choice to deactivate the AI agent embedding.
By deactivating the embedding, you can prevent the AI agent from being accessible through the public link or embedded on your website. This gives you control over when and how the AI agent is available for use.