Cascader
In our daily work life, we often encounter scenarios where we need to select from a set of associated data collections, such as selecting the associated state and city, company organization structure, item classification, etc.
In AITable, when you encounter these scenarios, you can use a Cascader field type to present your data. To use a Cascader field, you need to link the current field to another configuration datasheet. By using a Cascader field, you can select from a hierarchy of options。
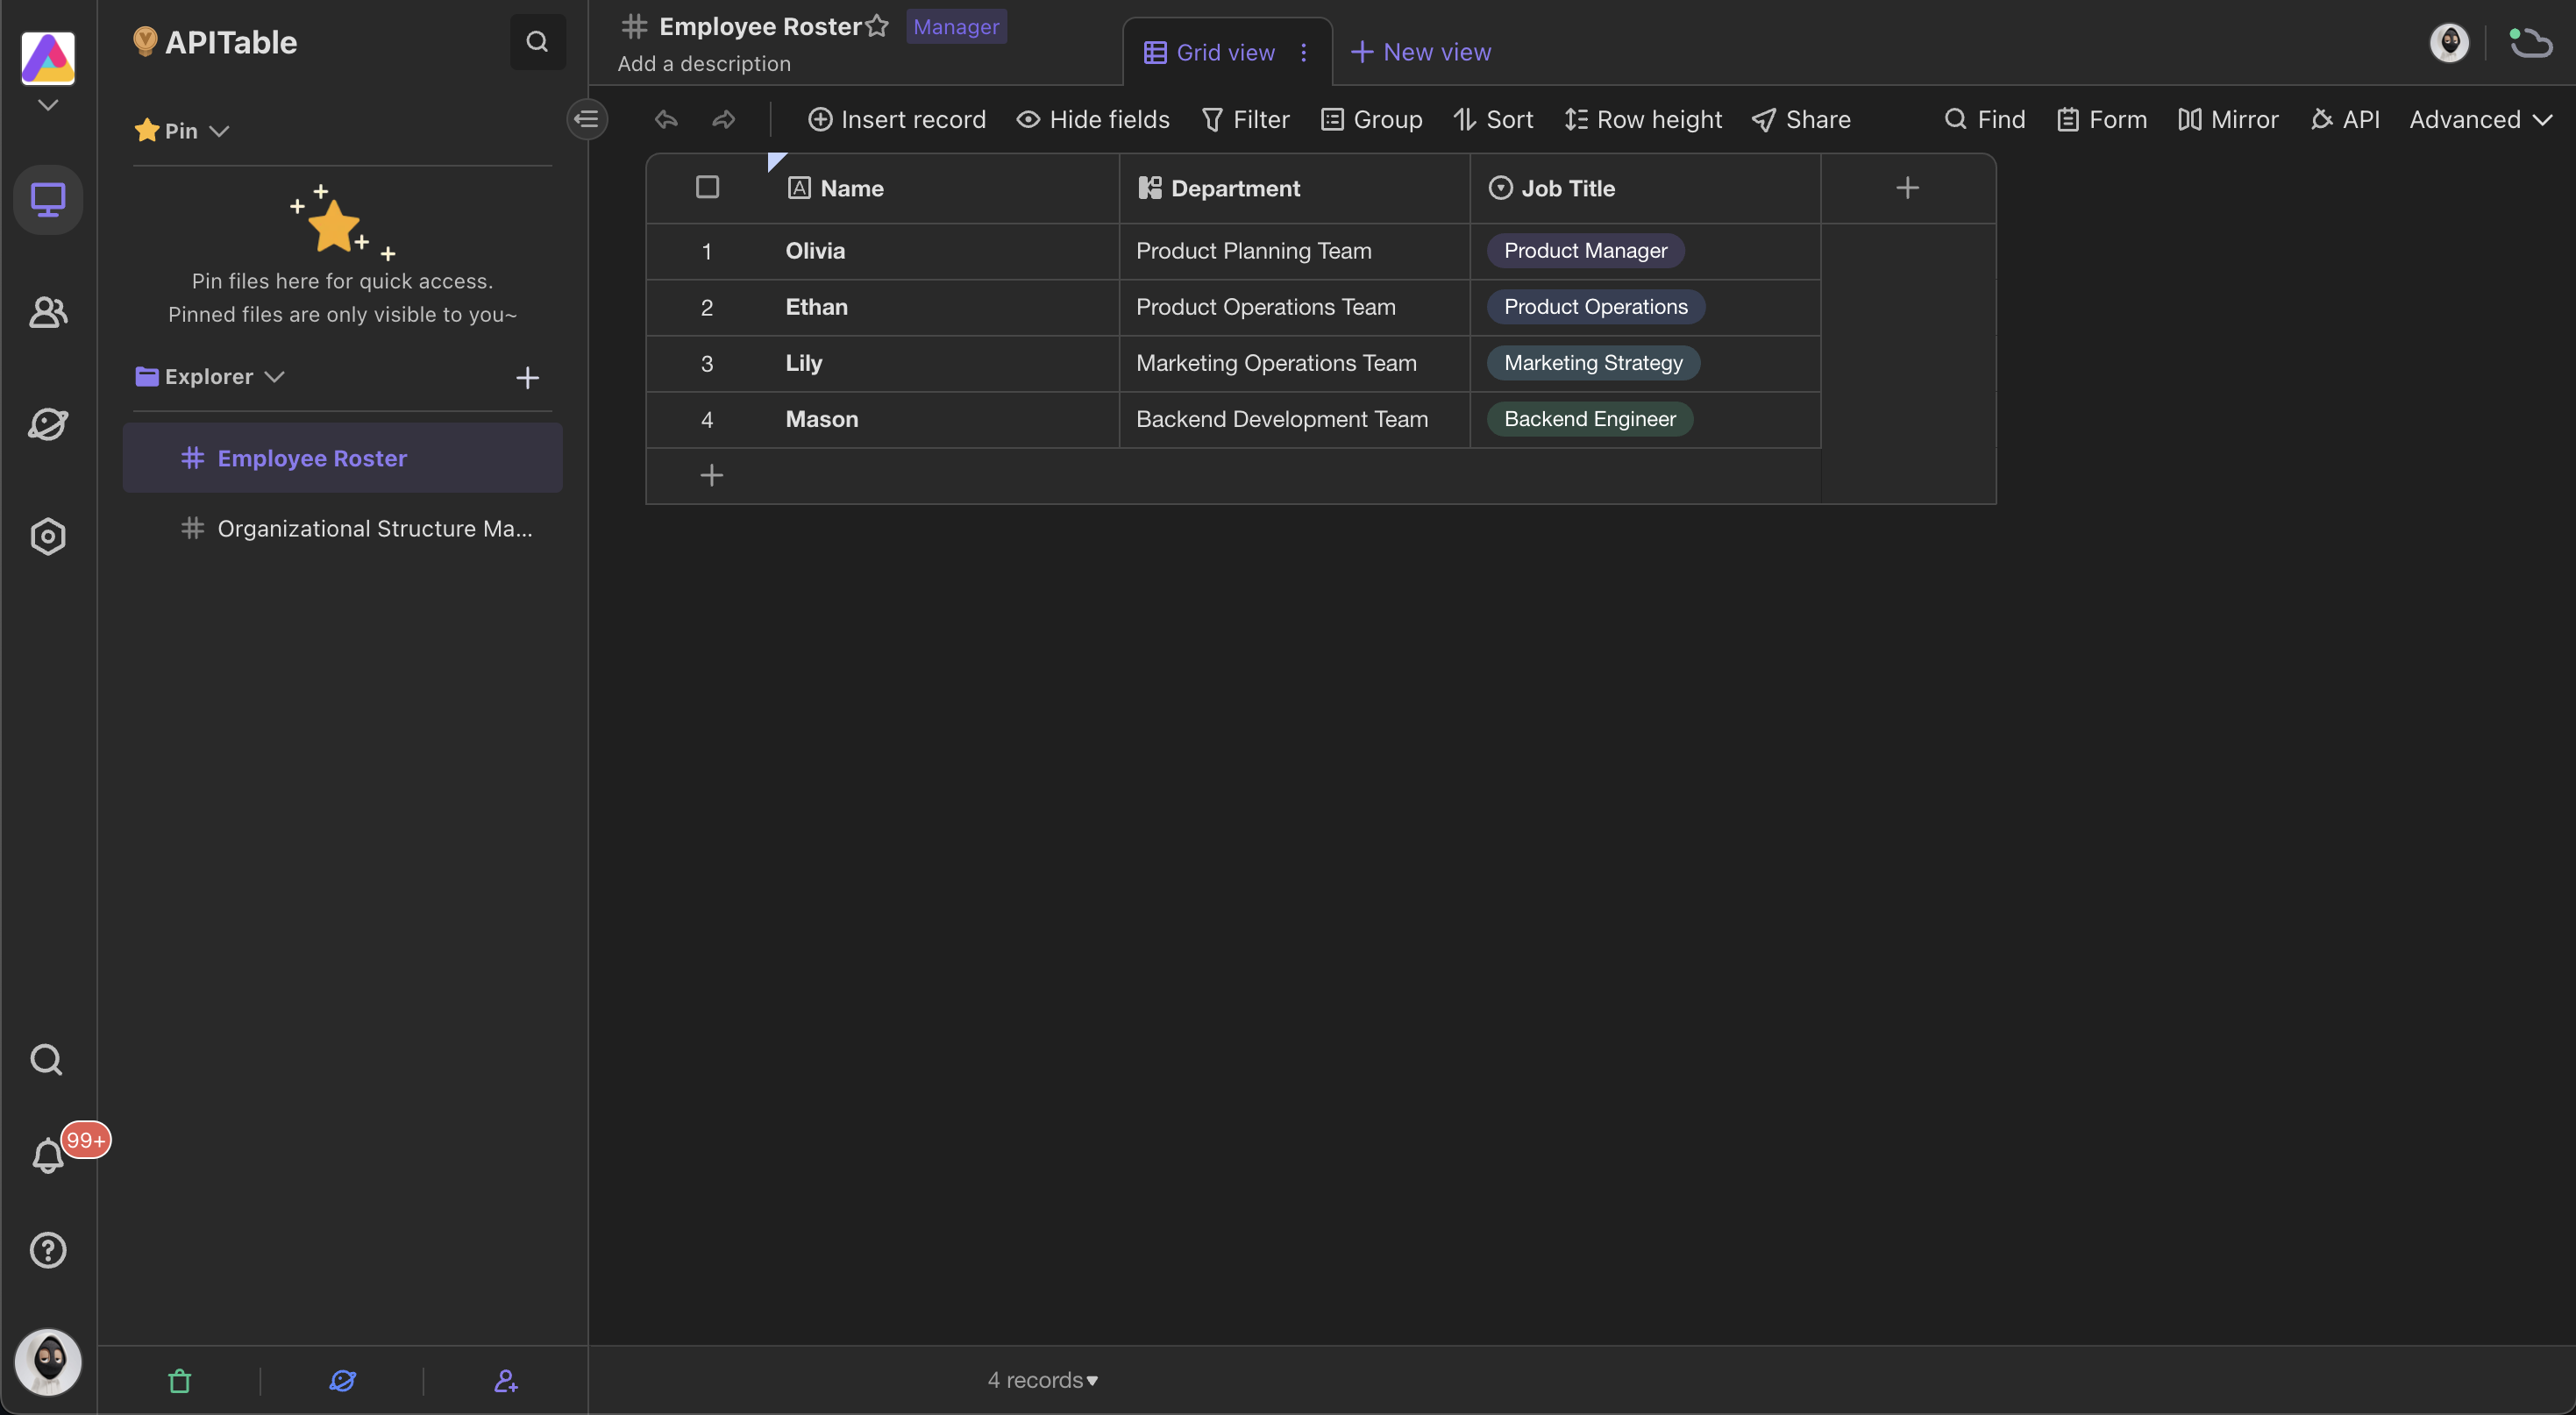
For example, in the use case of creating a datasheet to display company organization structure, we need two datasheets: "Organization Structure Management" and "Employee Roster". We can show the hierarchical relationship of company departments in the "Organization Structure Management" datasheet so that each employee's department can be directly selected through "Cascader" in the "Employee Roster" datasheet, as shown in the figure below.
How to create Cascader relationship to choose from
Firstly, you must prepare a configuration datasheet for configuring the cascading rules before creating a Cascader field. Here's an example for you to follow.
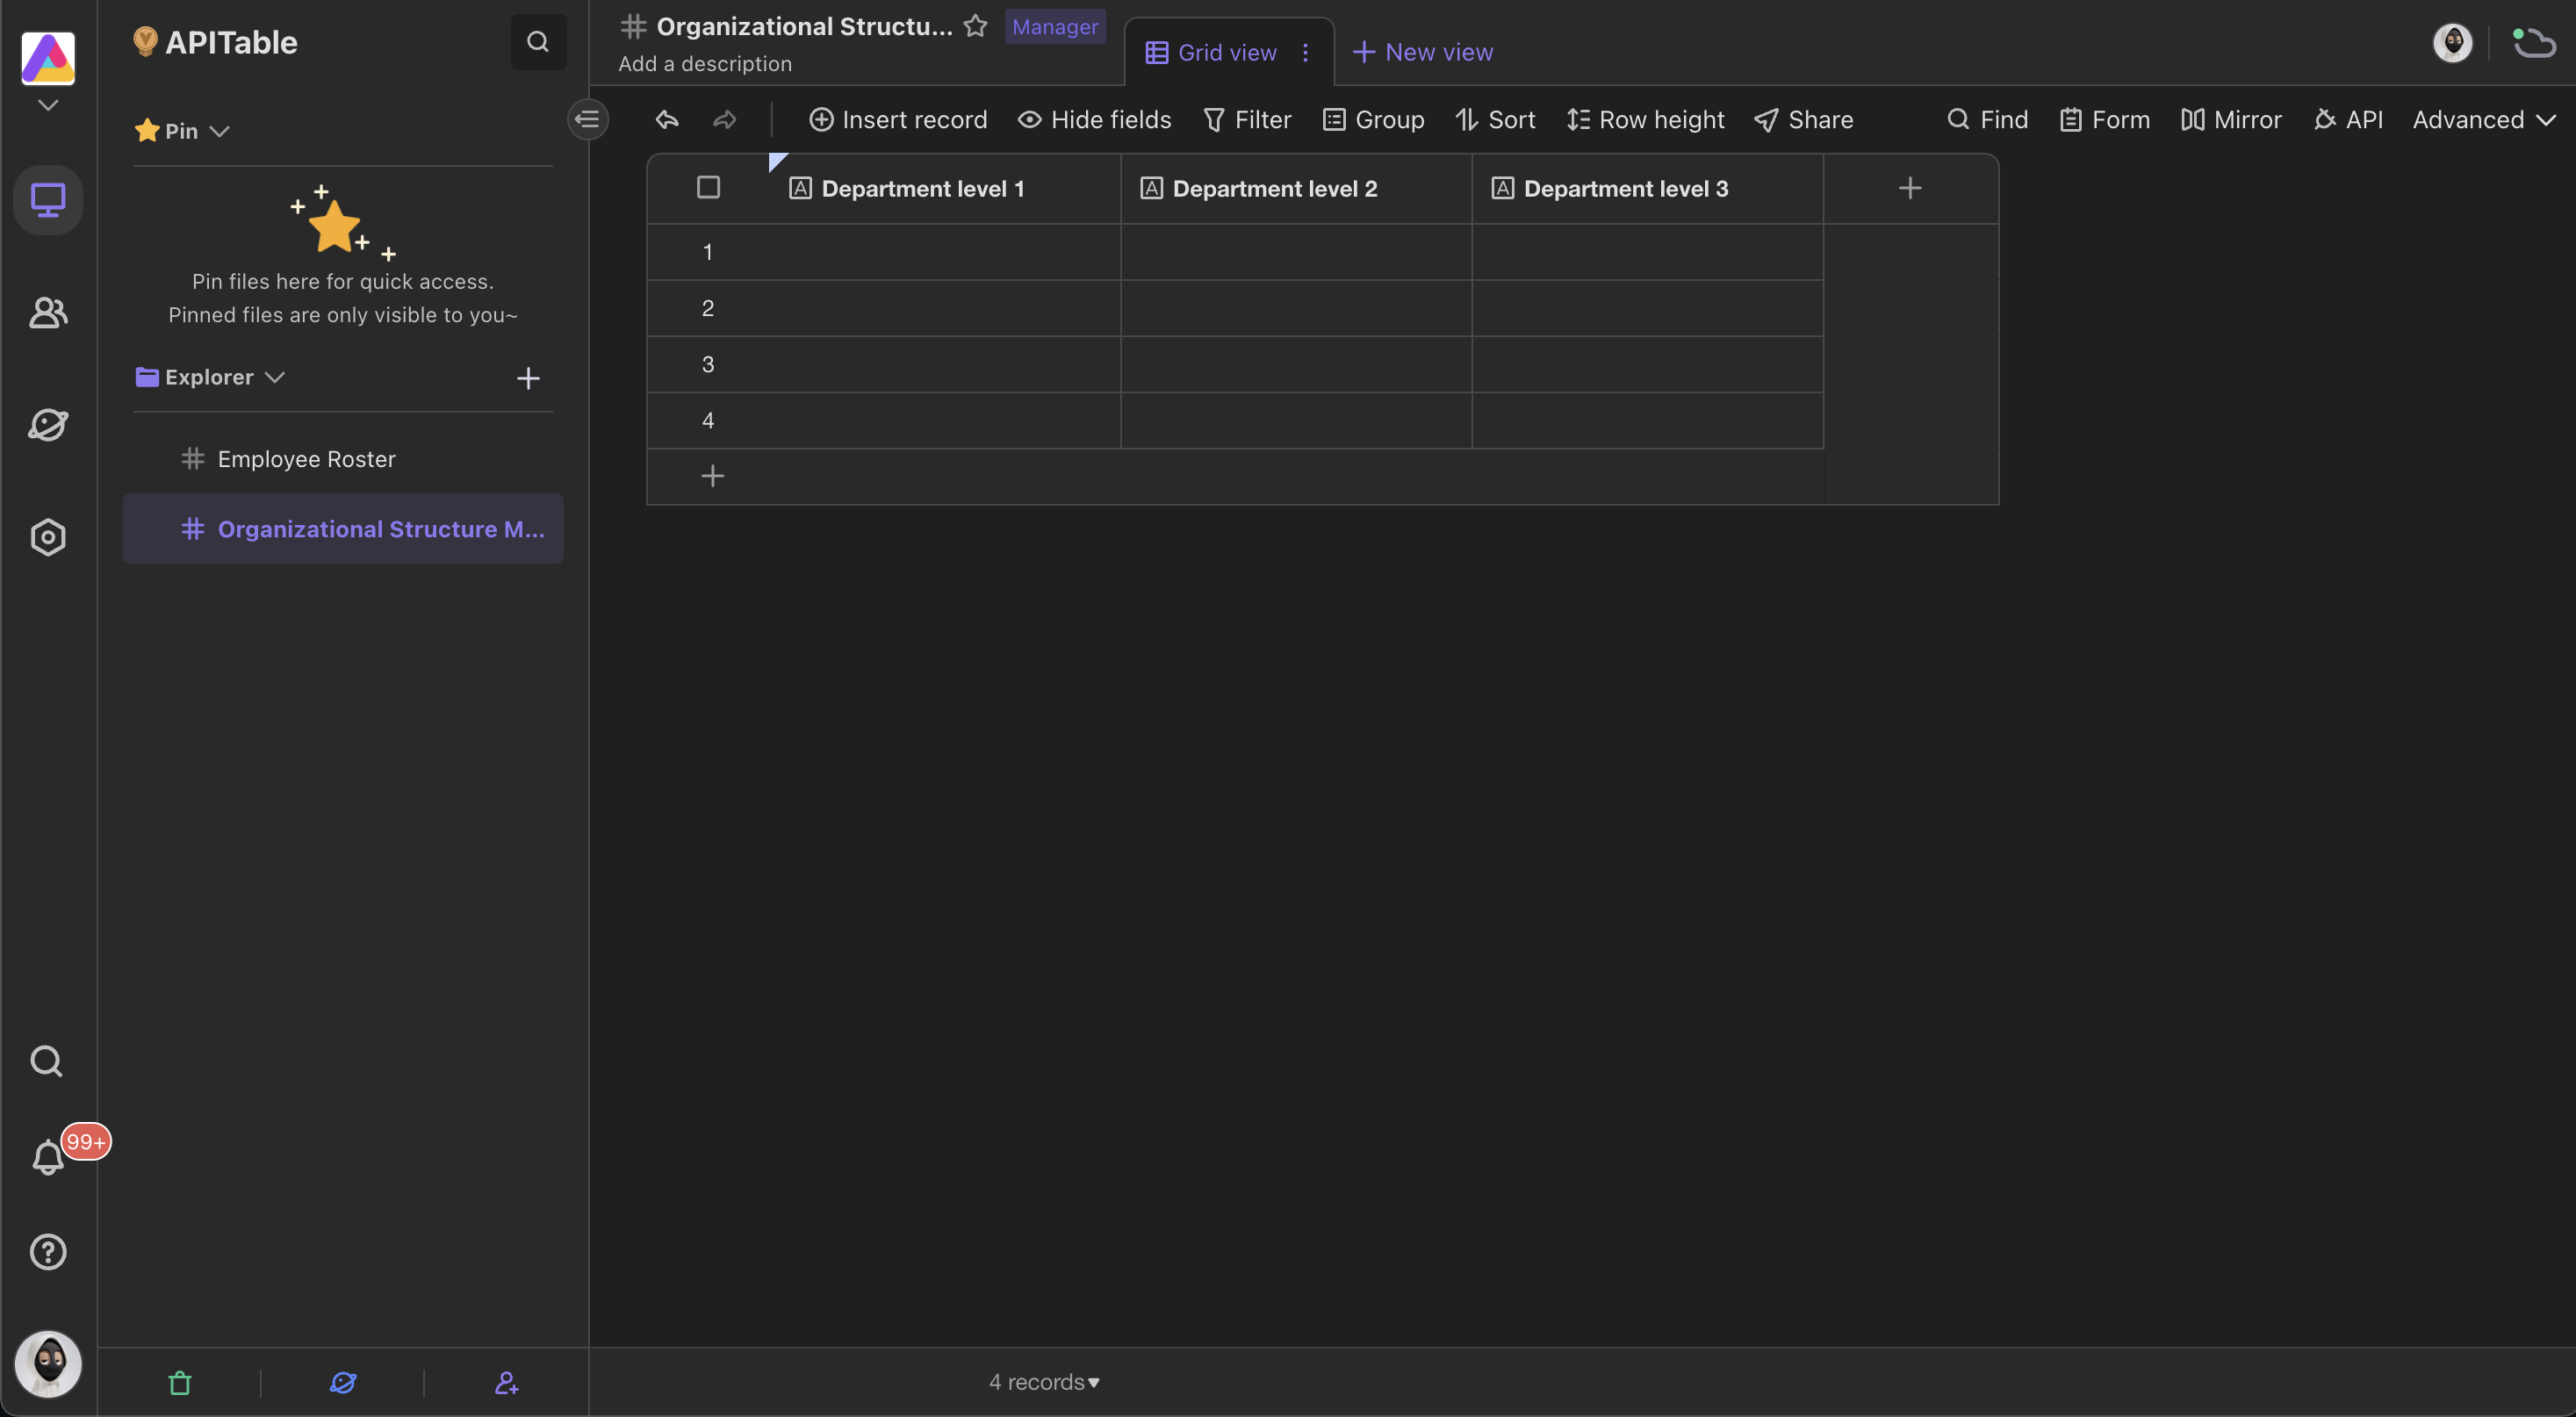
A blank datasheet with the name "Organizational Structure Management" should be created first. Then, as shown in the picture below, change all of the default field names to "Department Level 1," "Department Level 2," and "Department Level 3" and change all of the field types to "Single line text" (of course, you can adjust this portion according to your own desire).
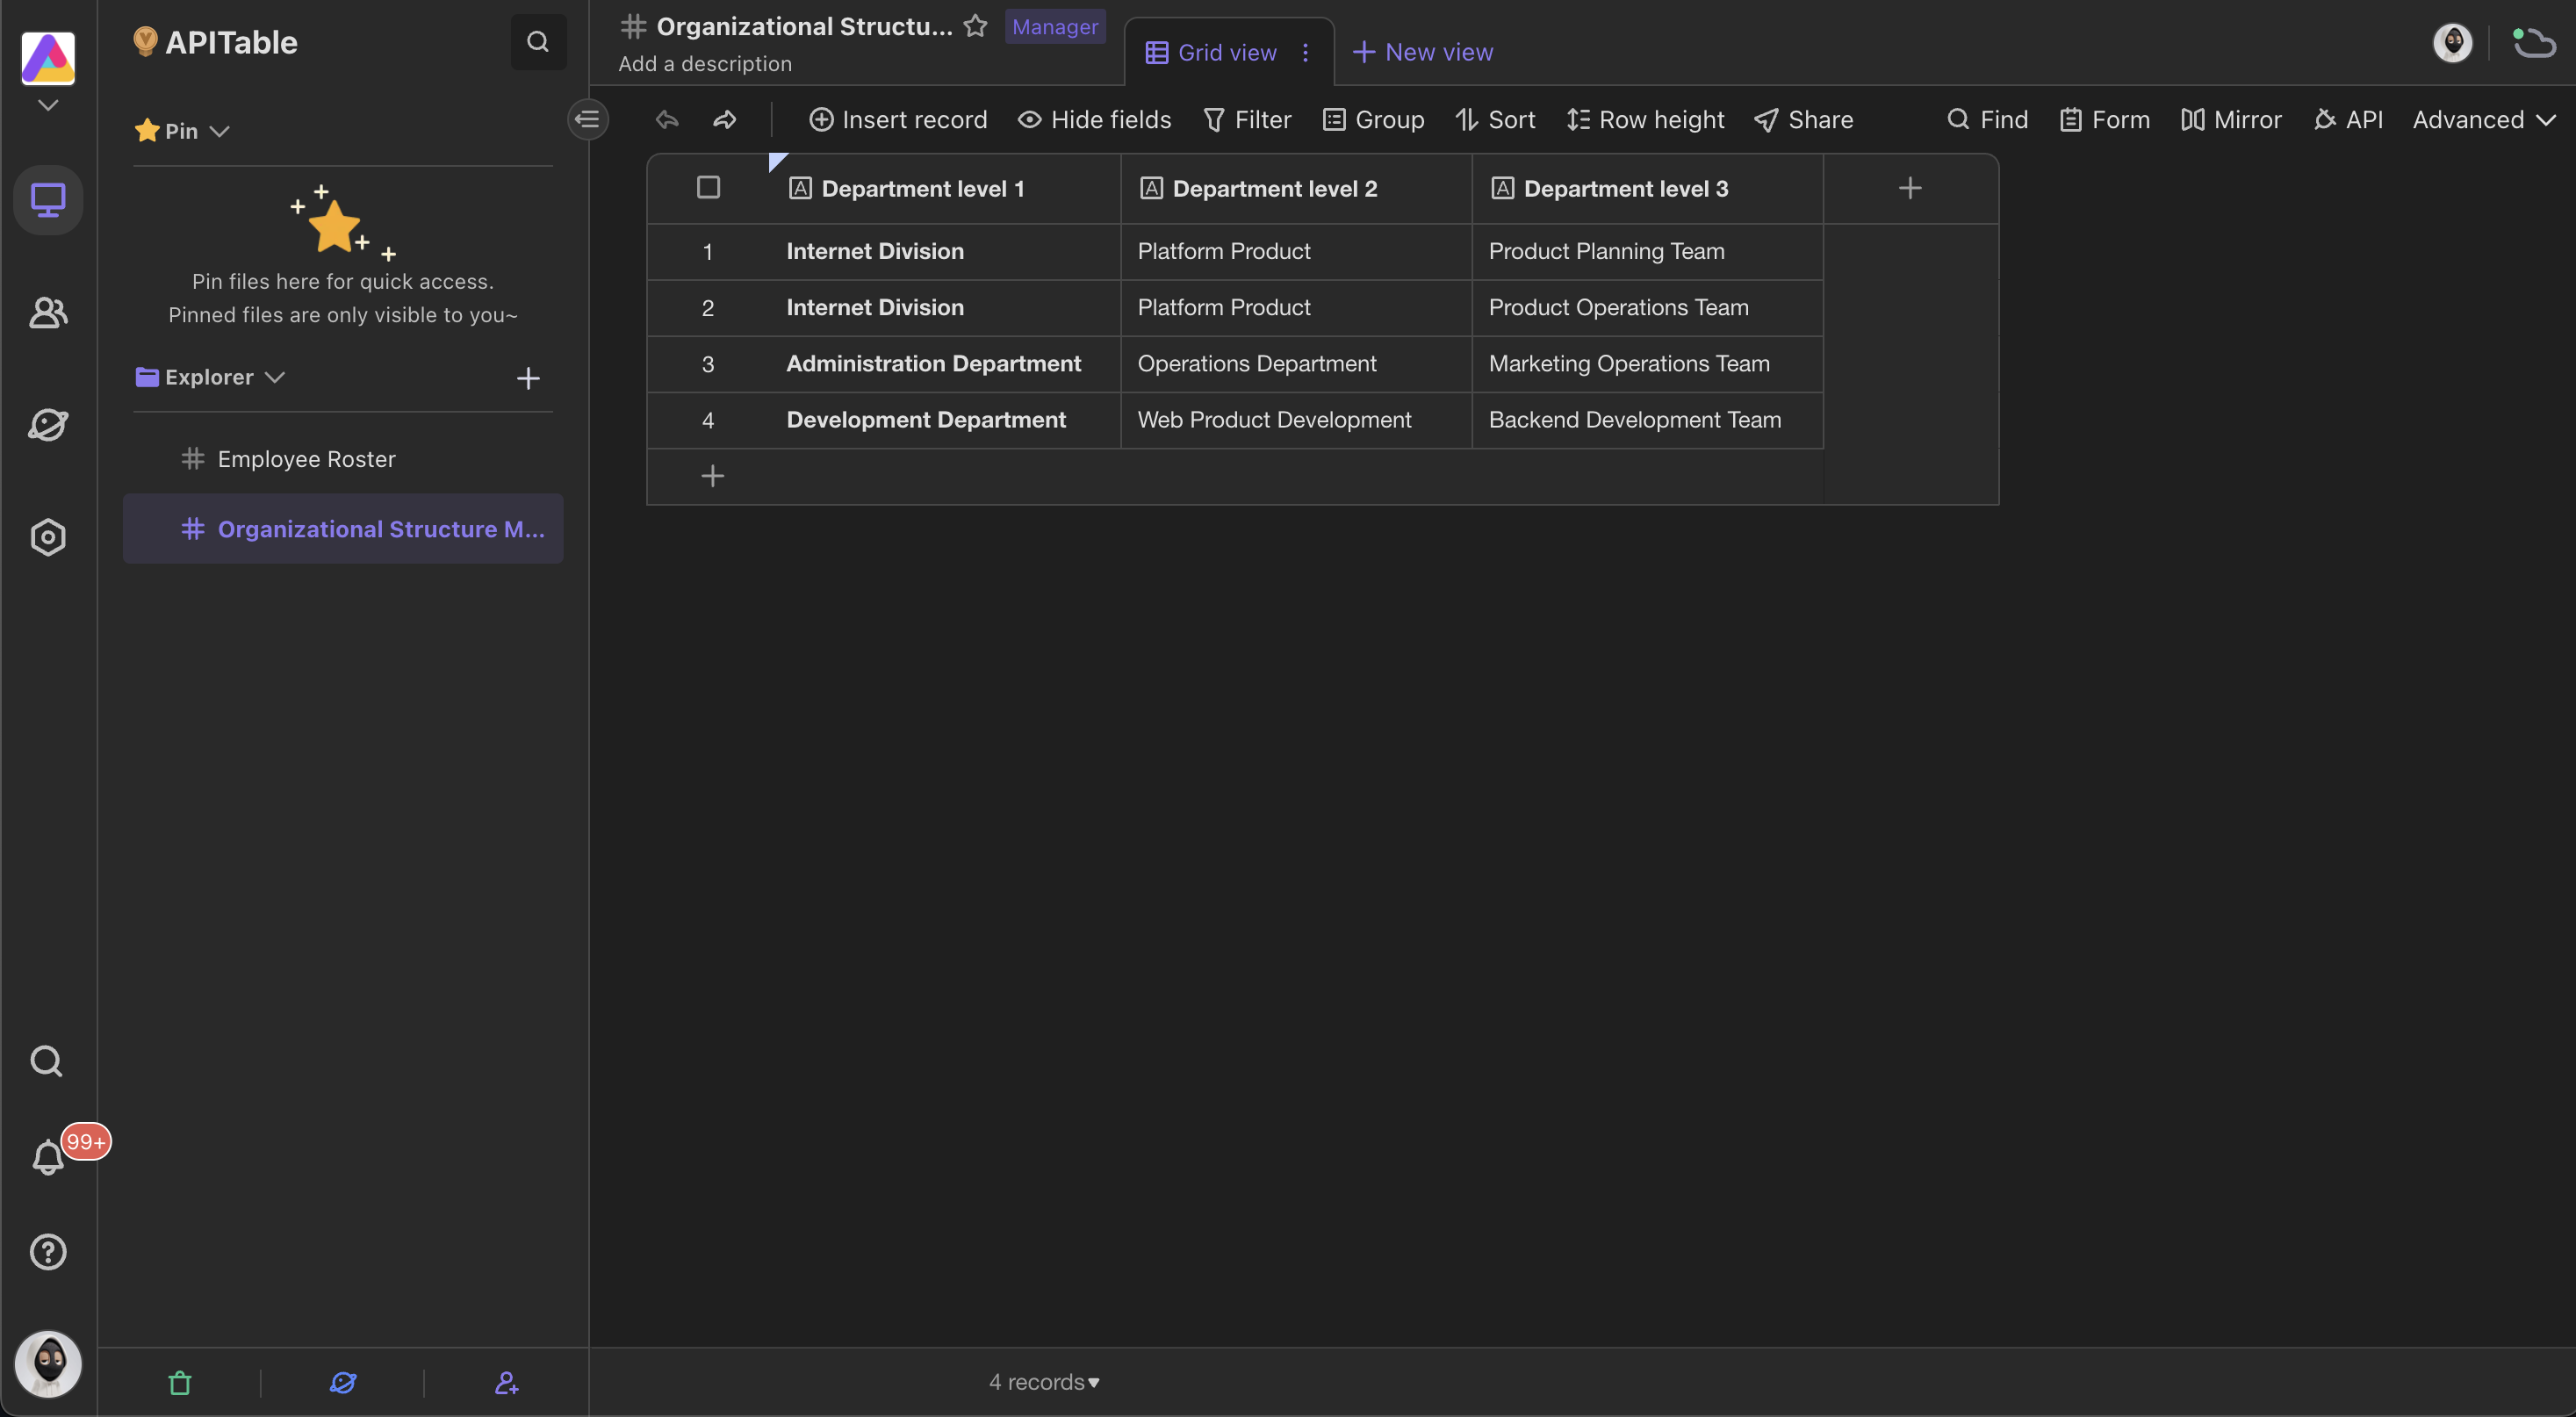
The next step is to establish the departmental hierarchy. It's very simple; we fill out the fields from left to right. For instance, if you want to configure "Internet Division/Platform Product Department/Product Planning Team," you can do so by adding a row to the datasheet, as shown below.
Creating a Cascader field
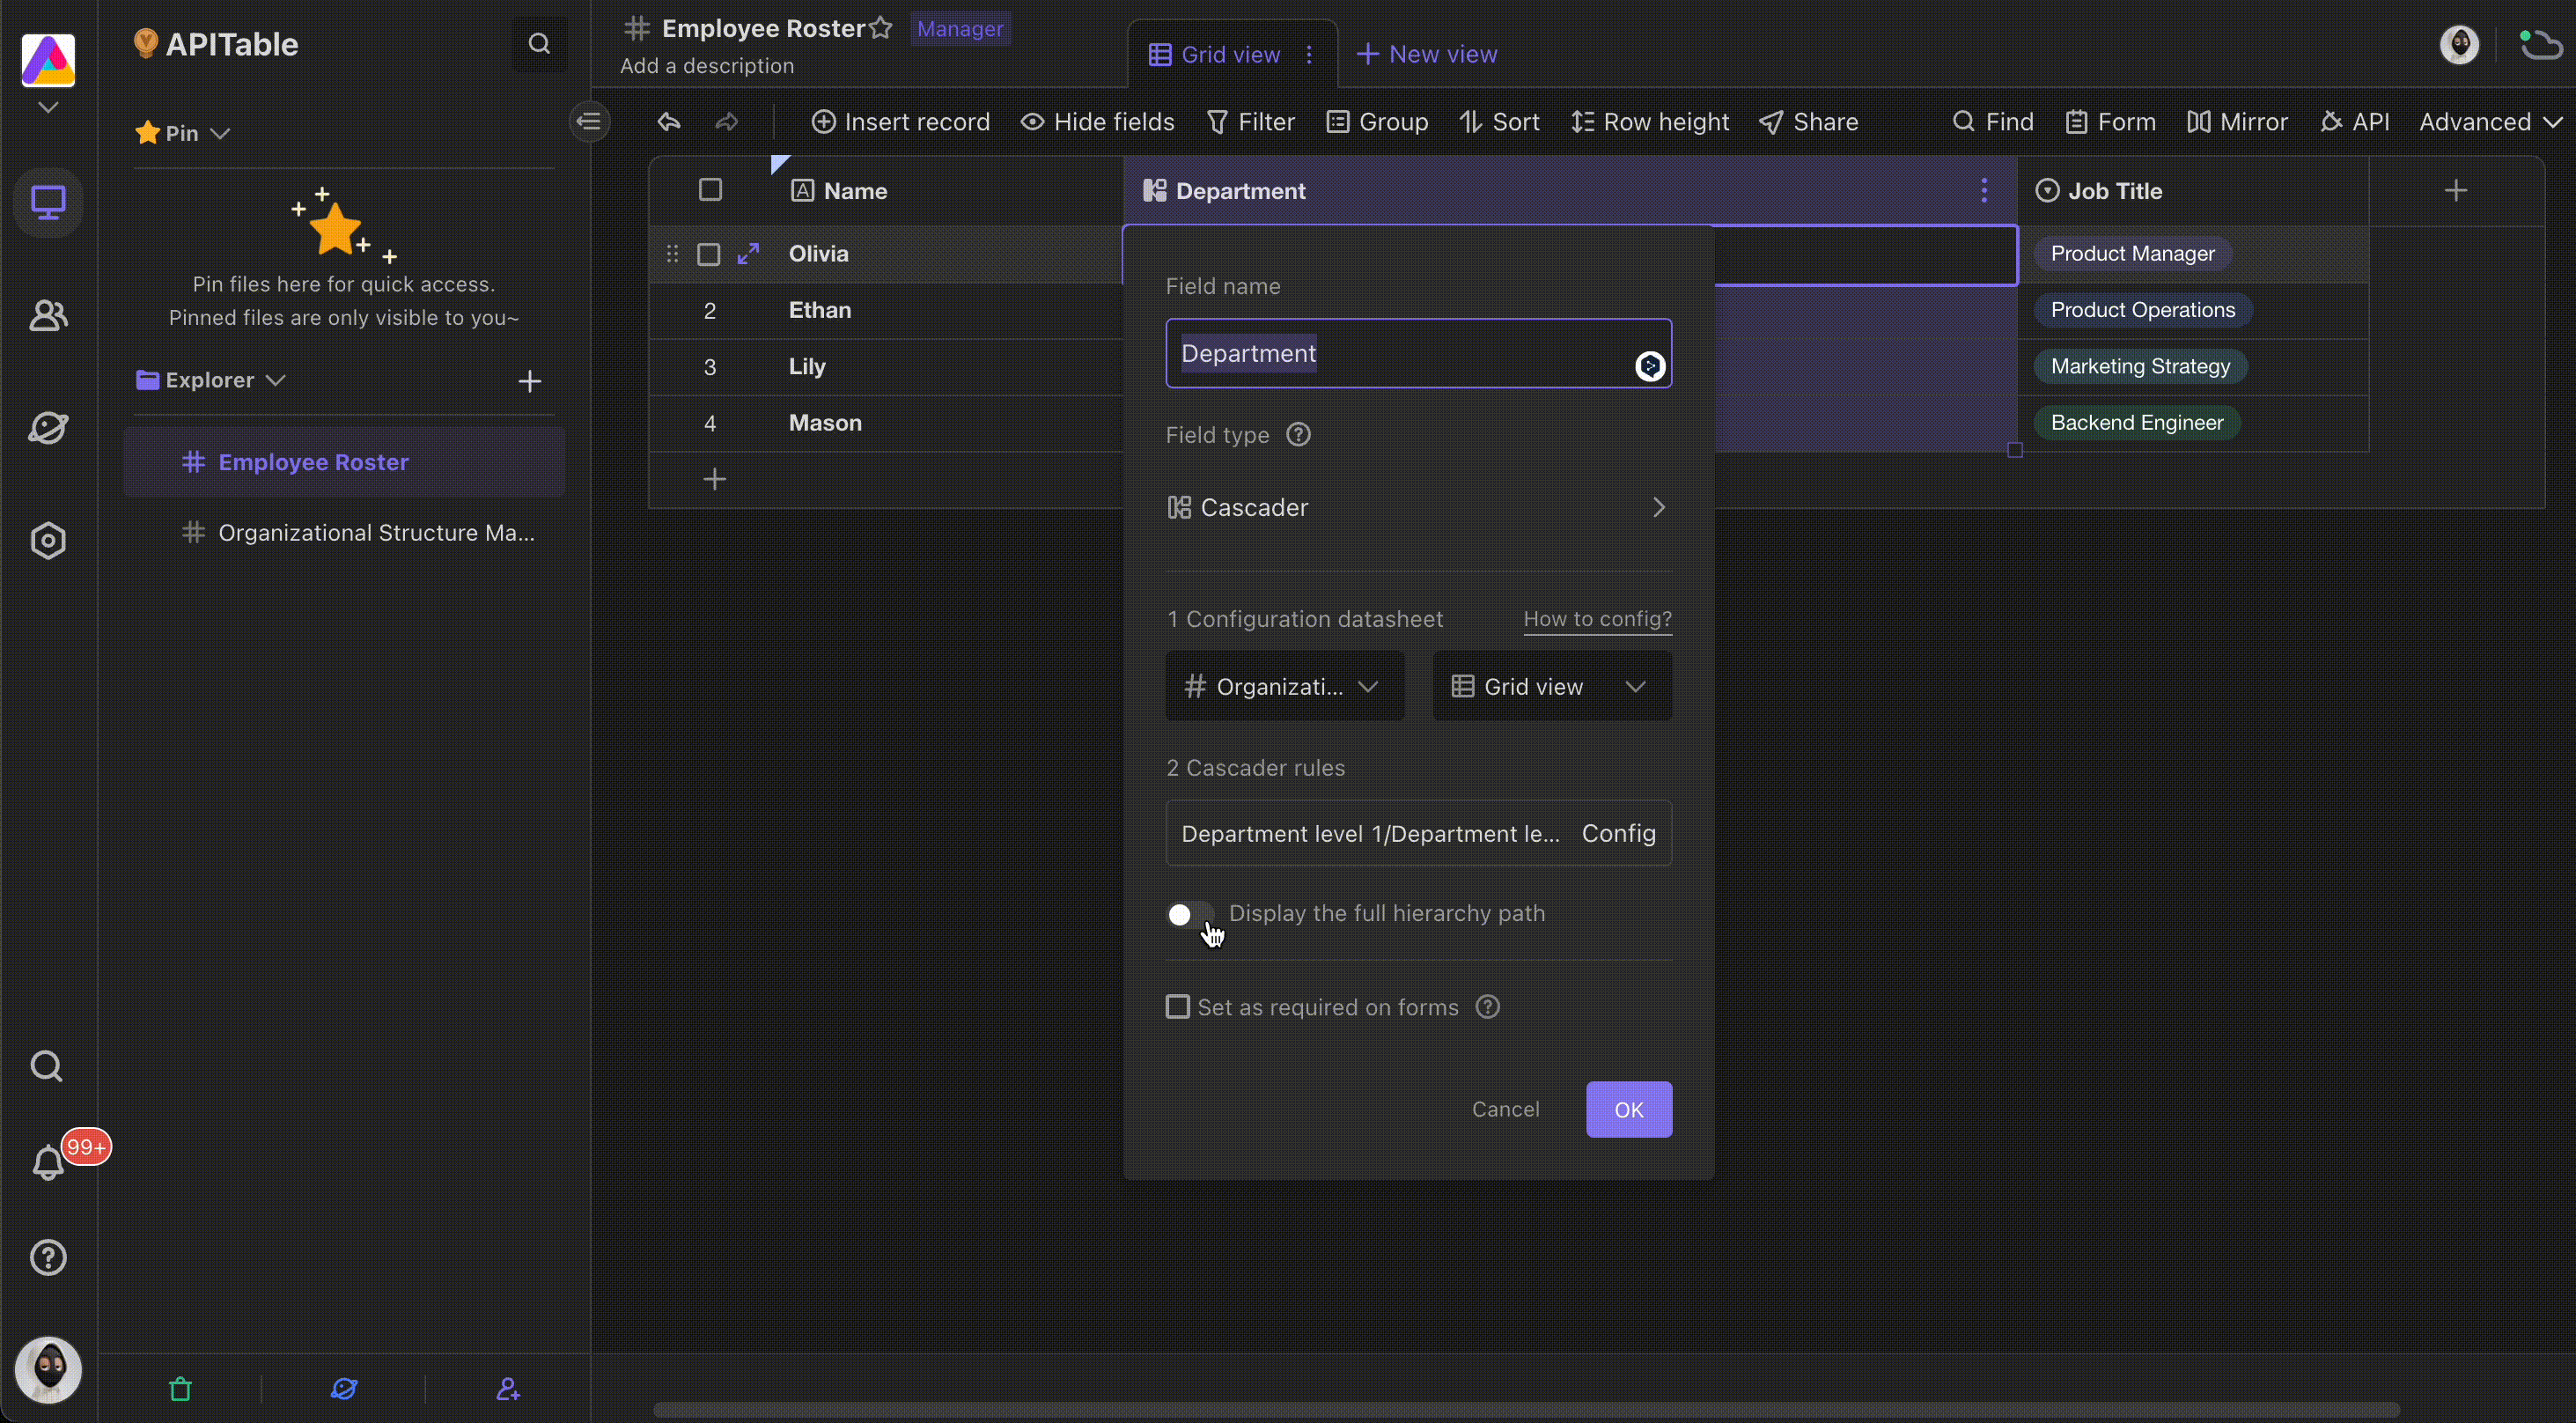
After completing the configuration datasheet, we can create the cascader field. Insert a "Department" field into the "Employee Roster" and change the field type to "Cascader."
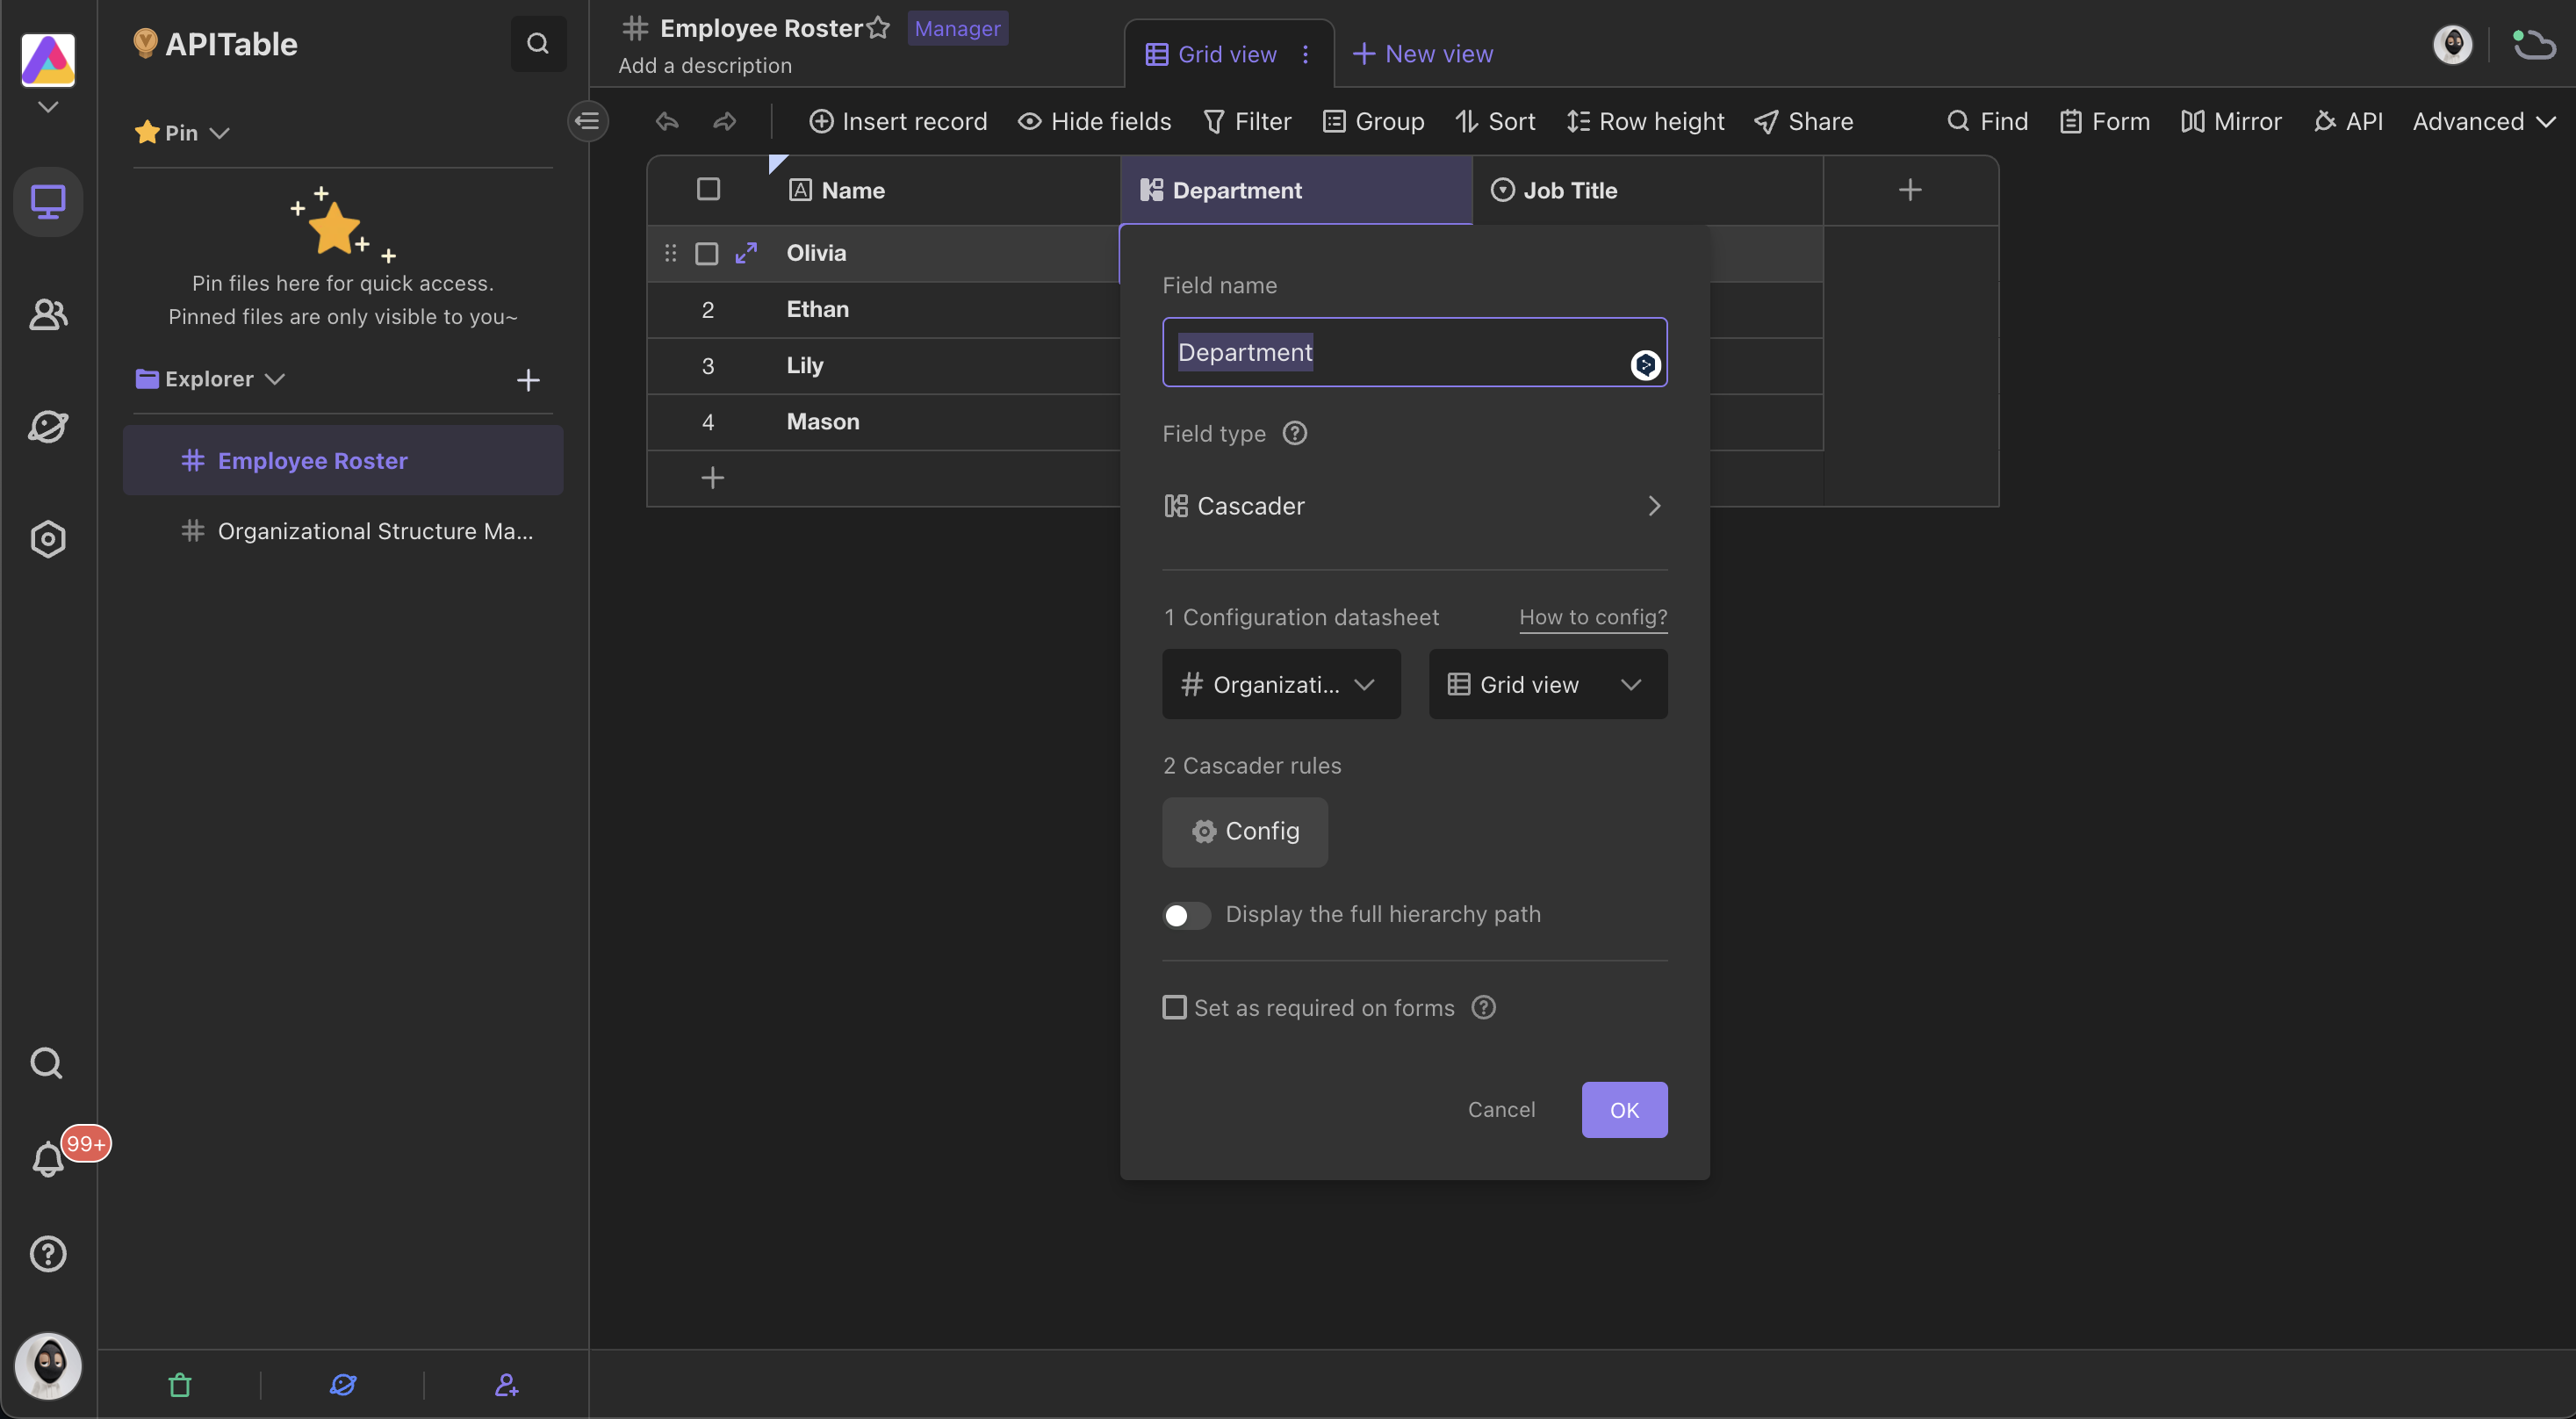
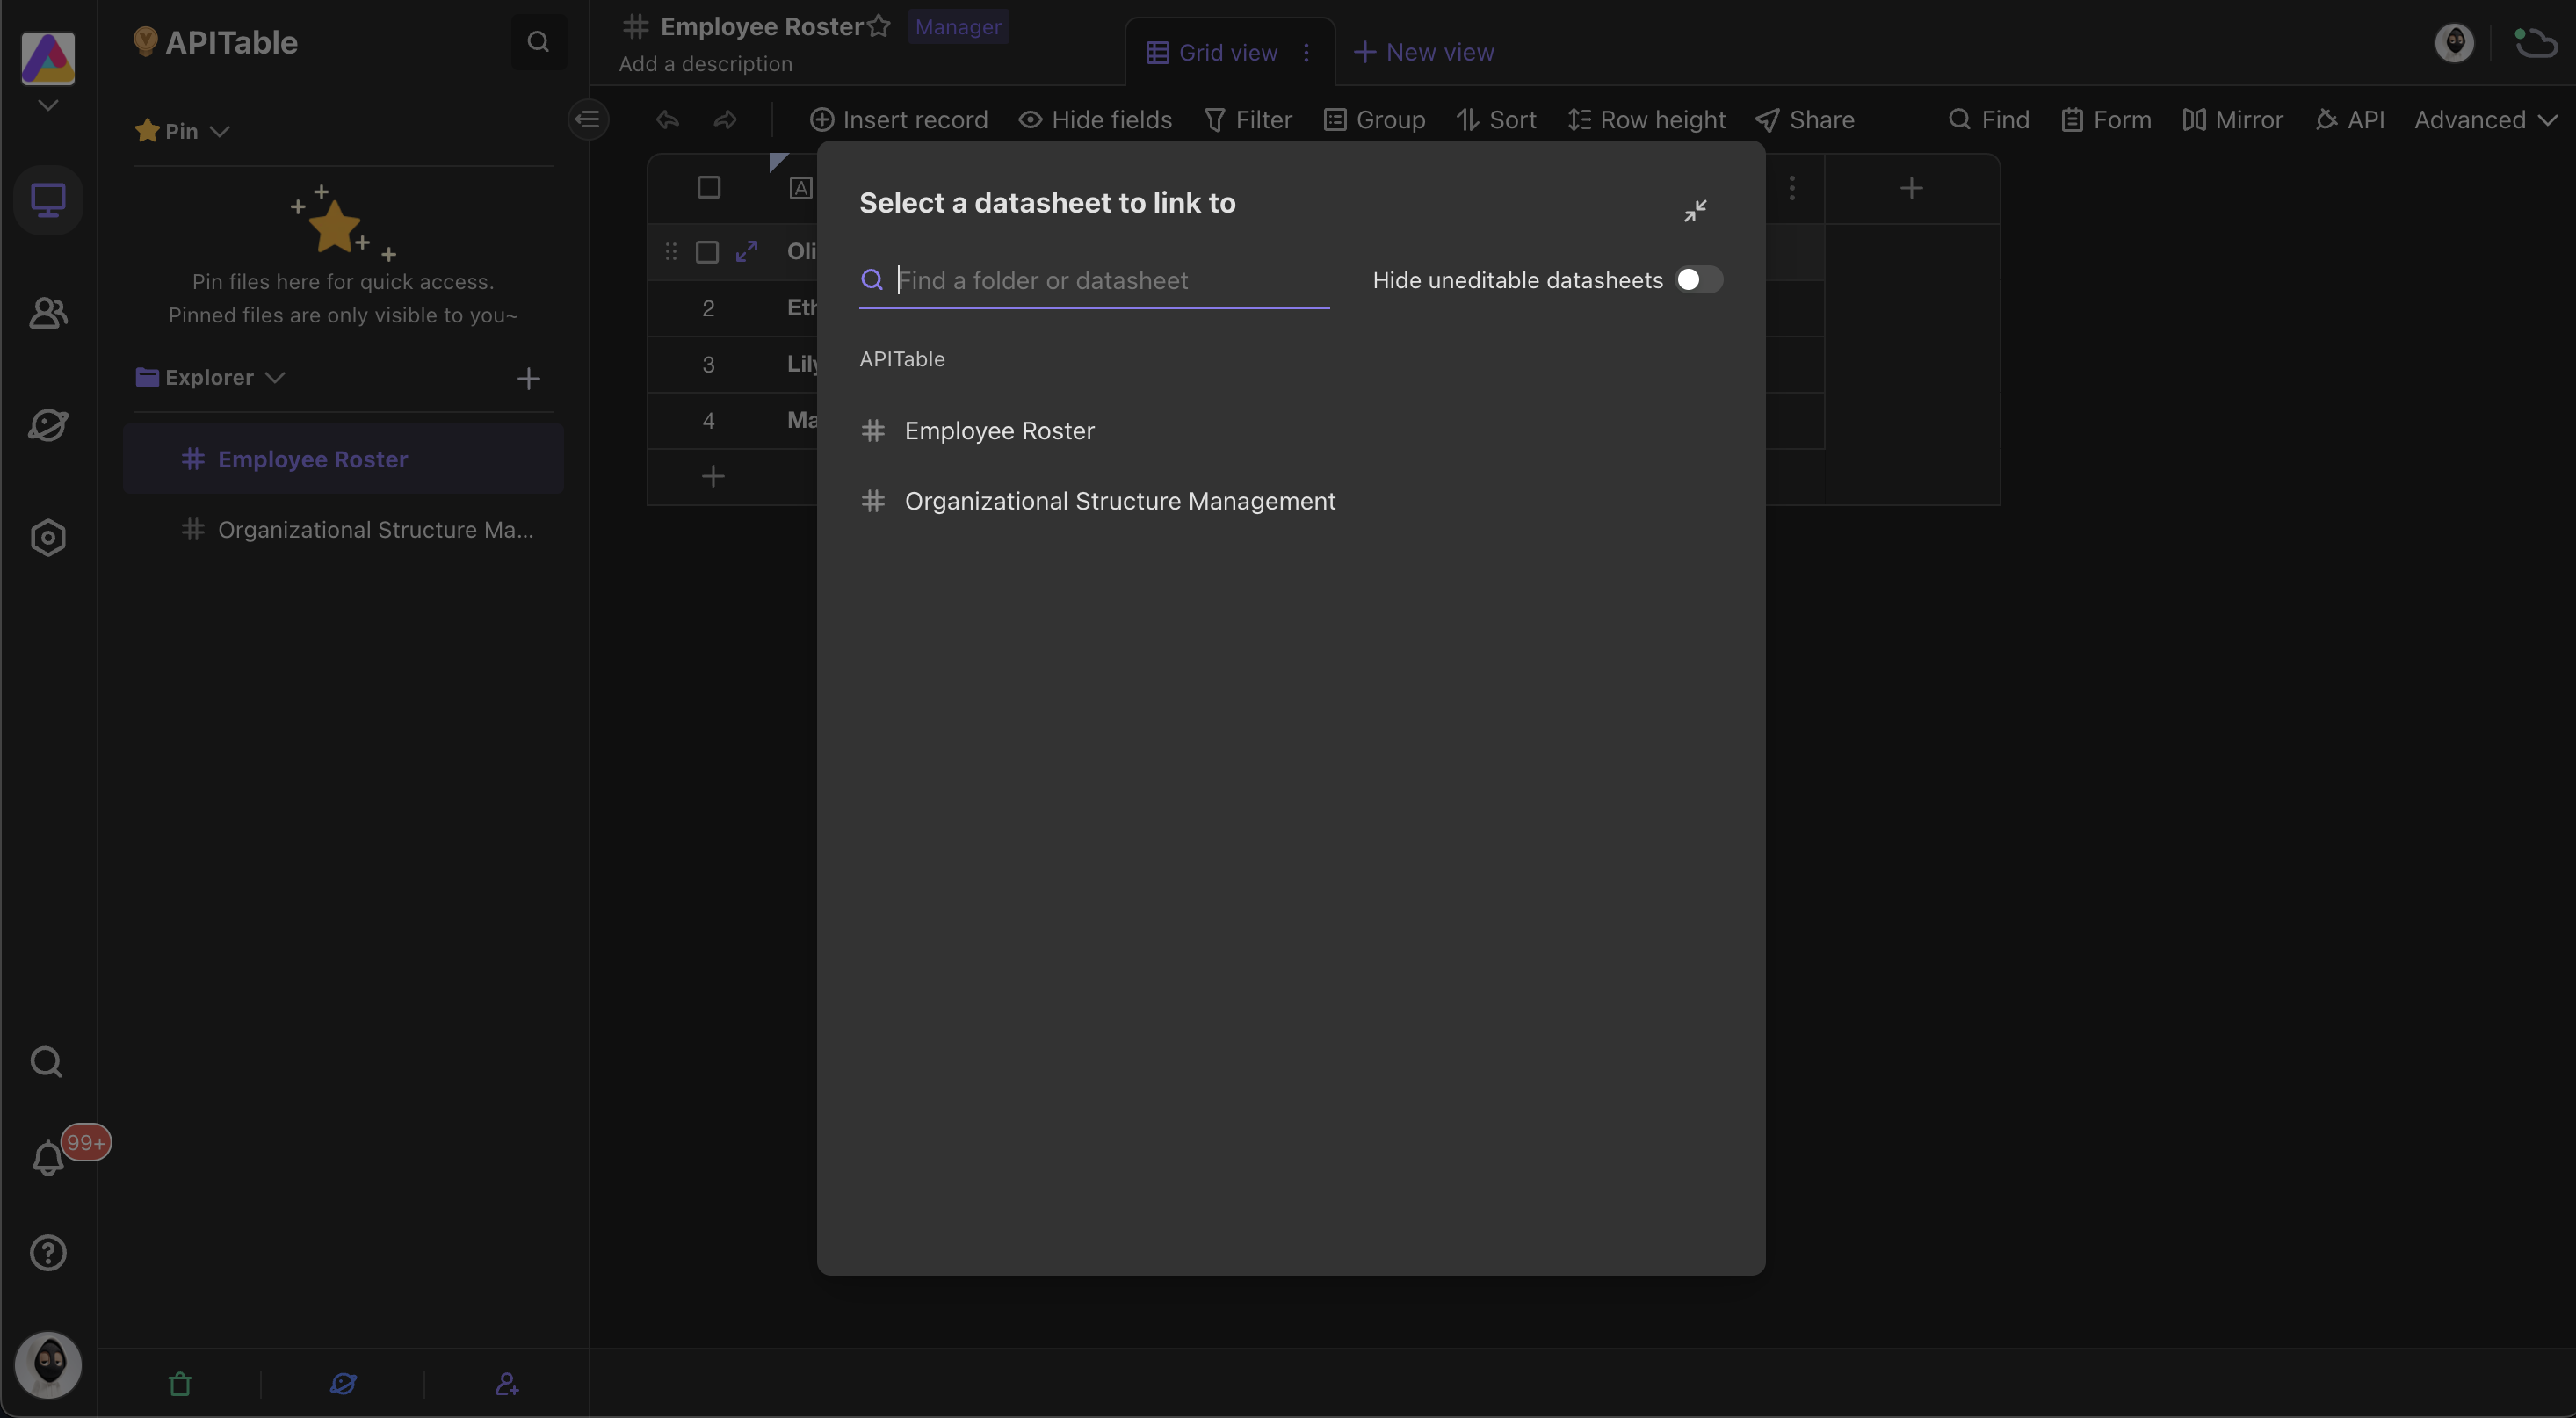
Then, to select a hierarchy relationship based on, we linked "Department" field with a configuration datasheet. You can find the configuration datasheet by searching. In this case, we chose one of the views of the datasheet - "Organization Structure Management" as the hierarchy structure.
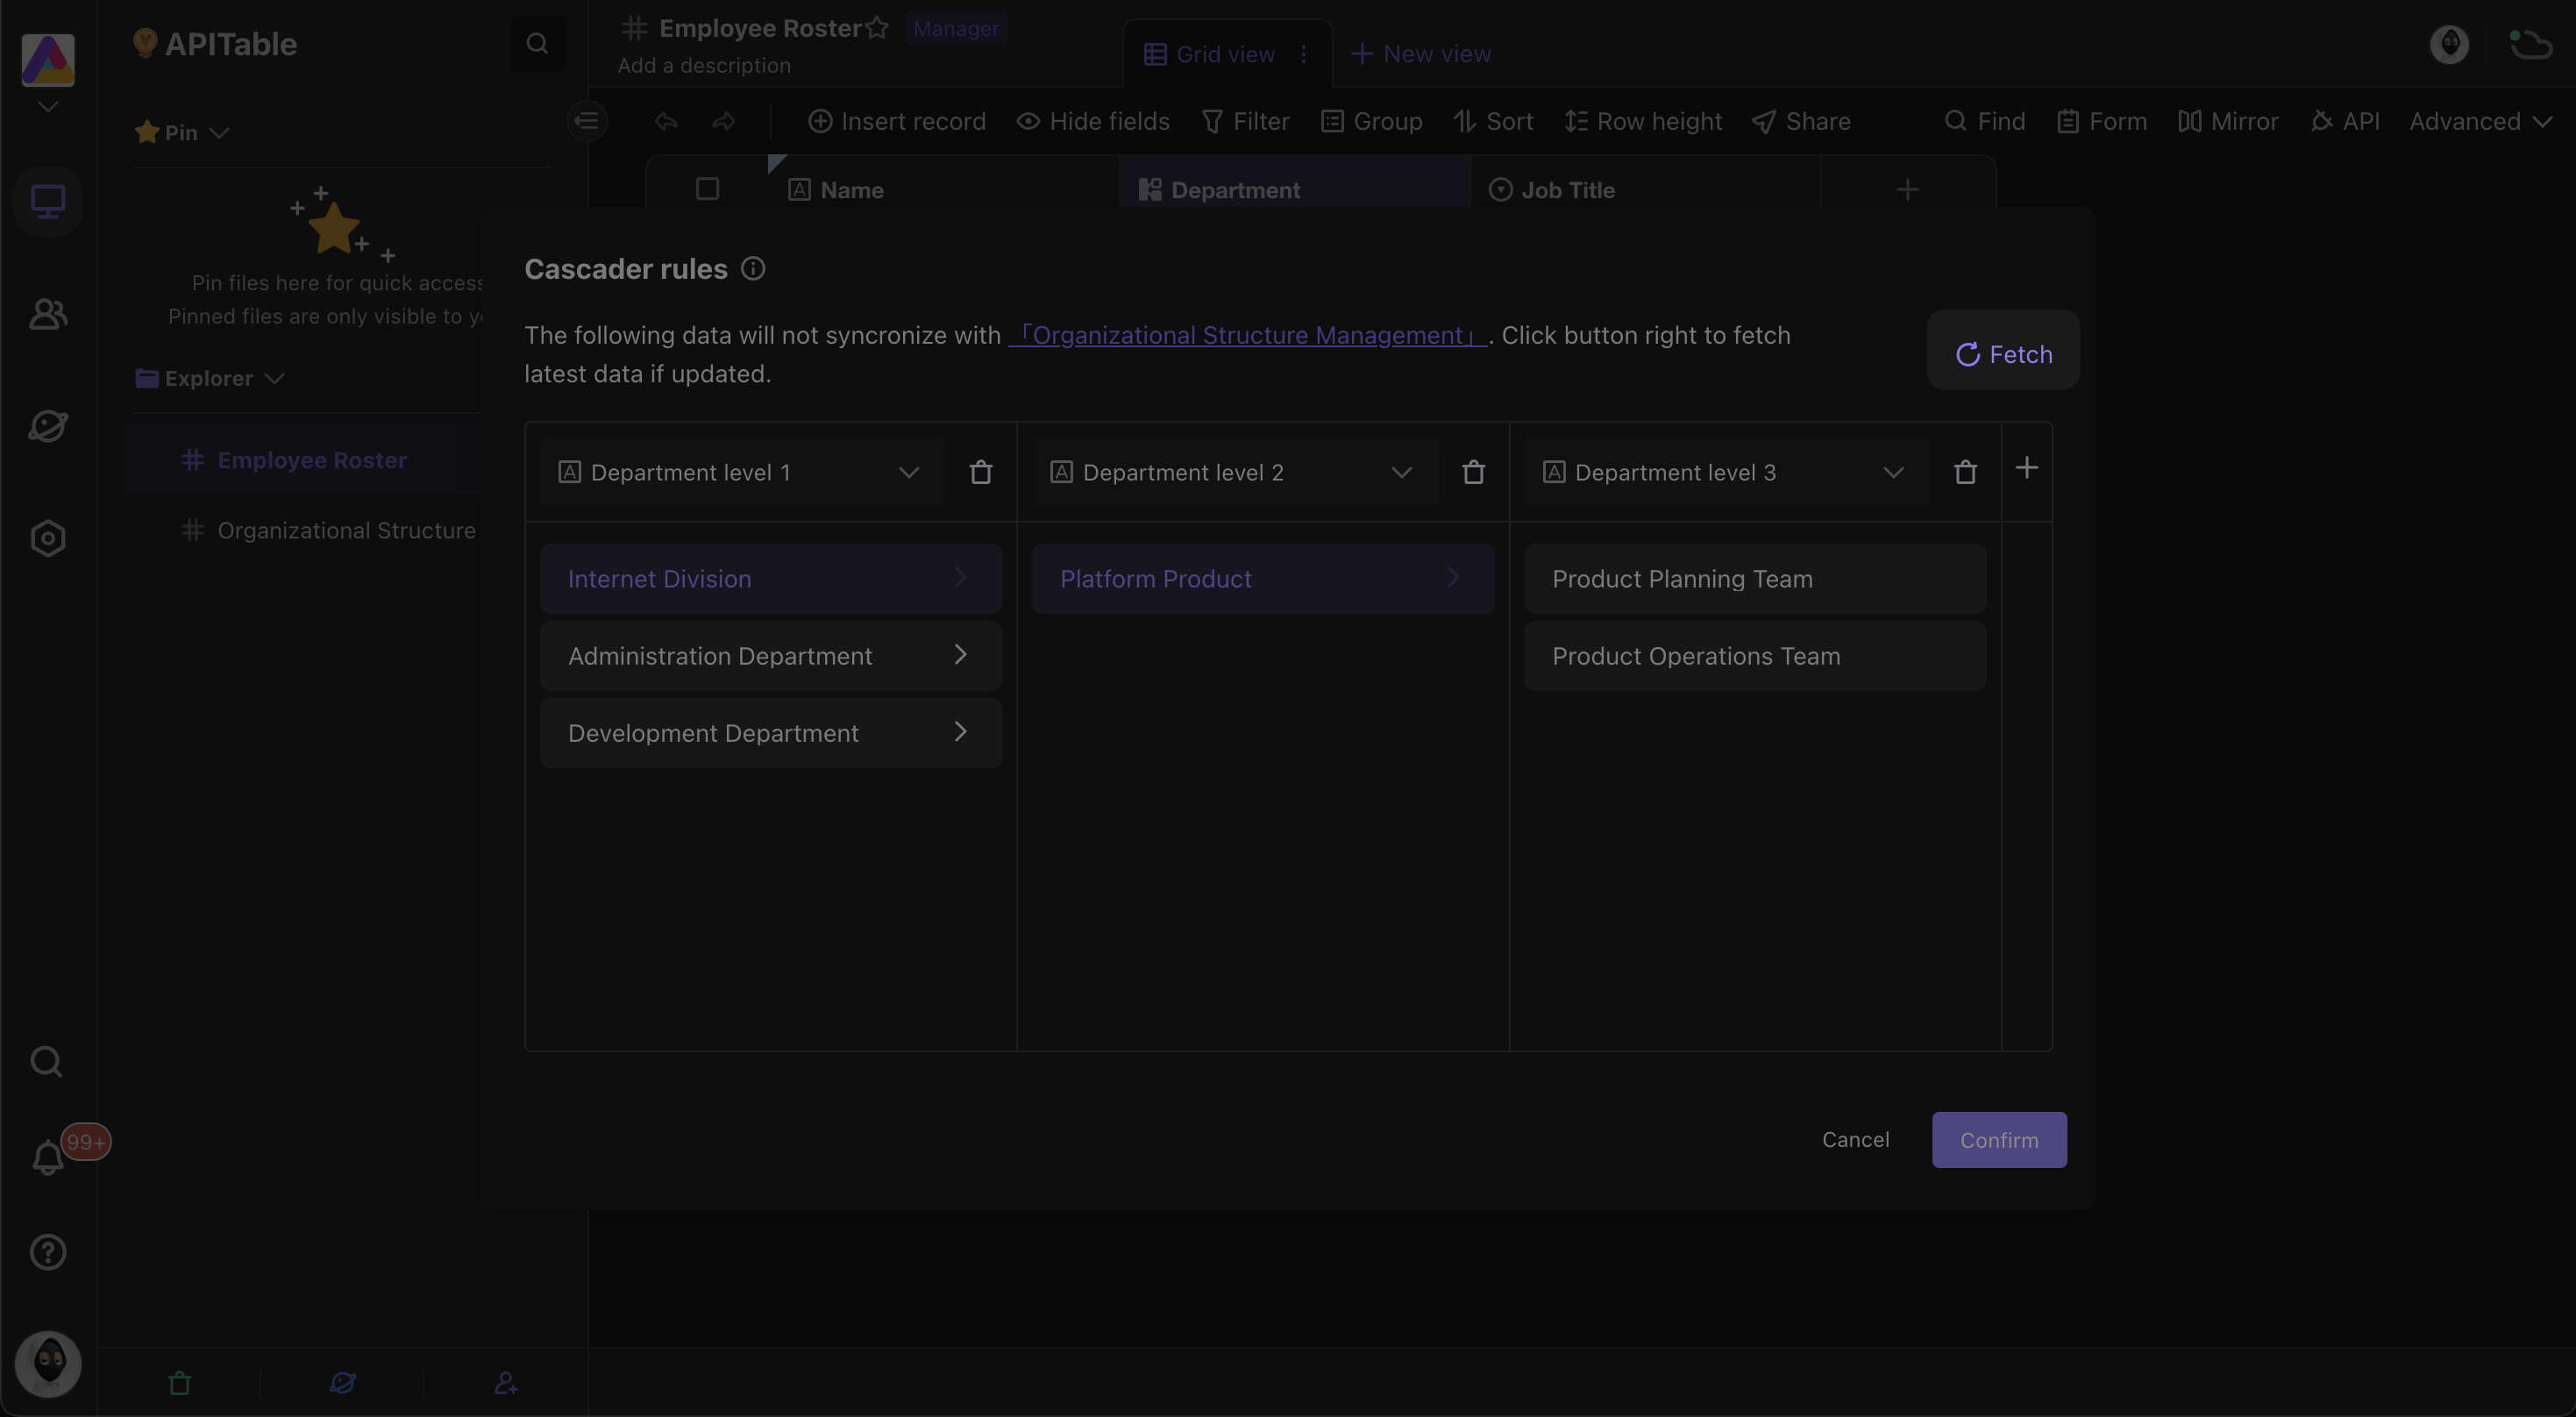
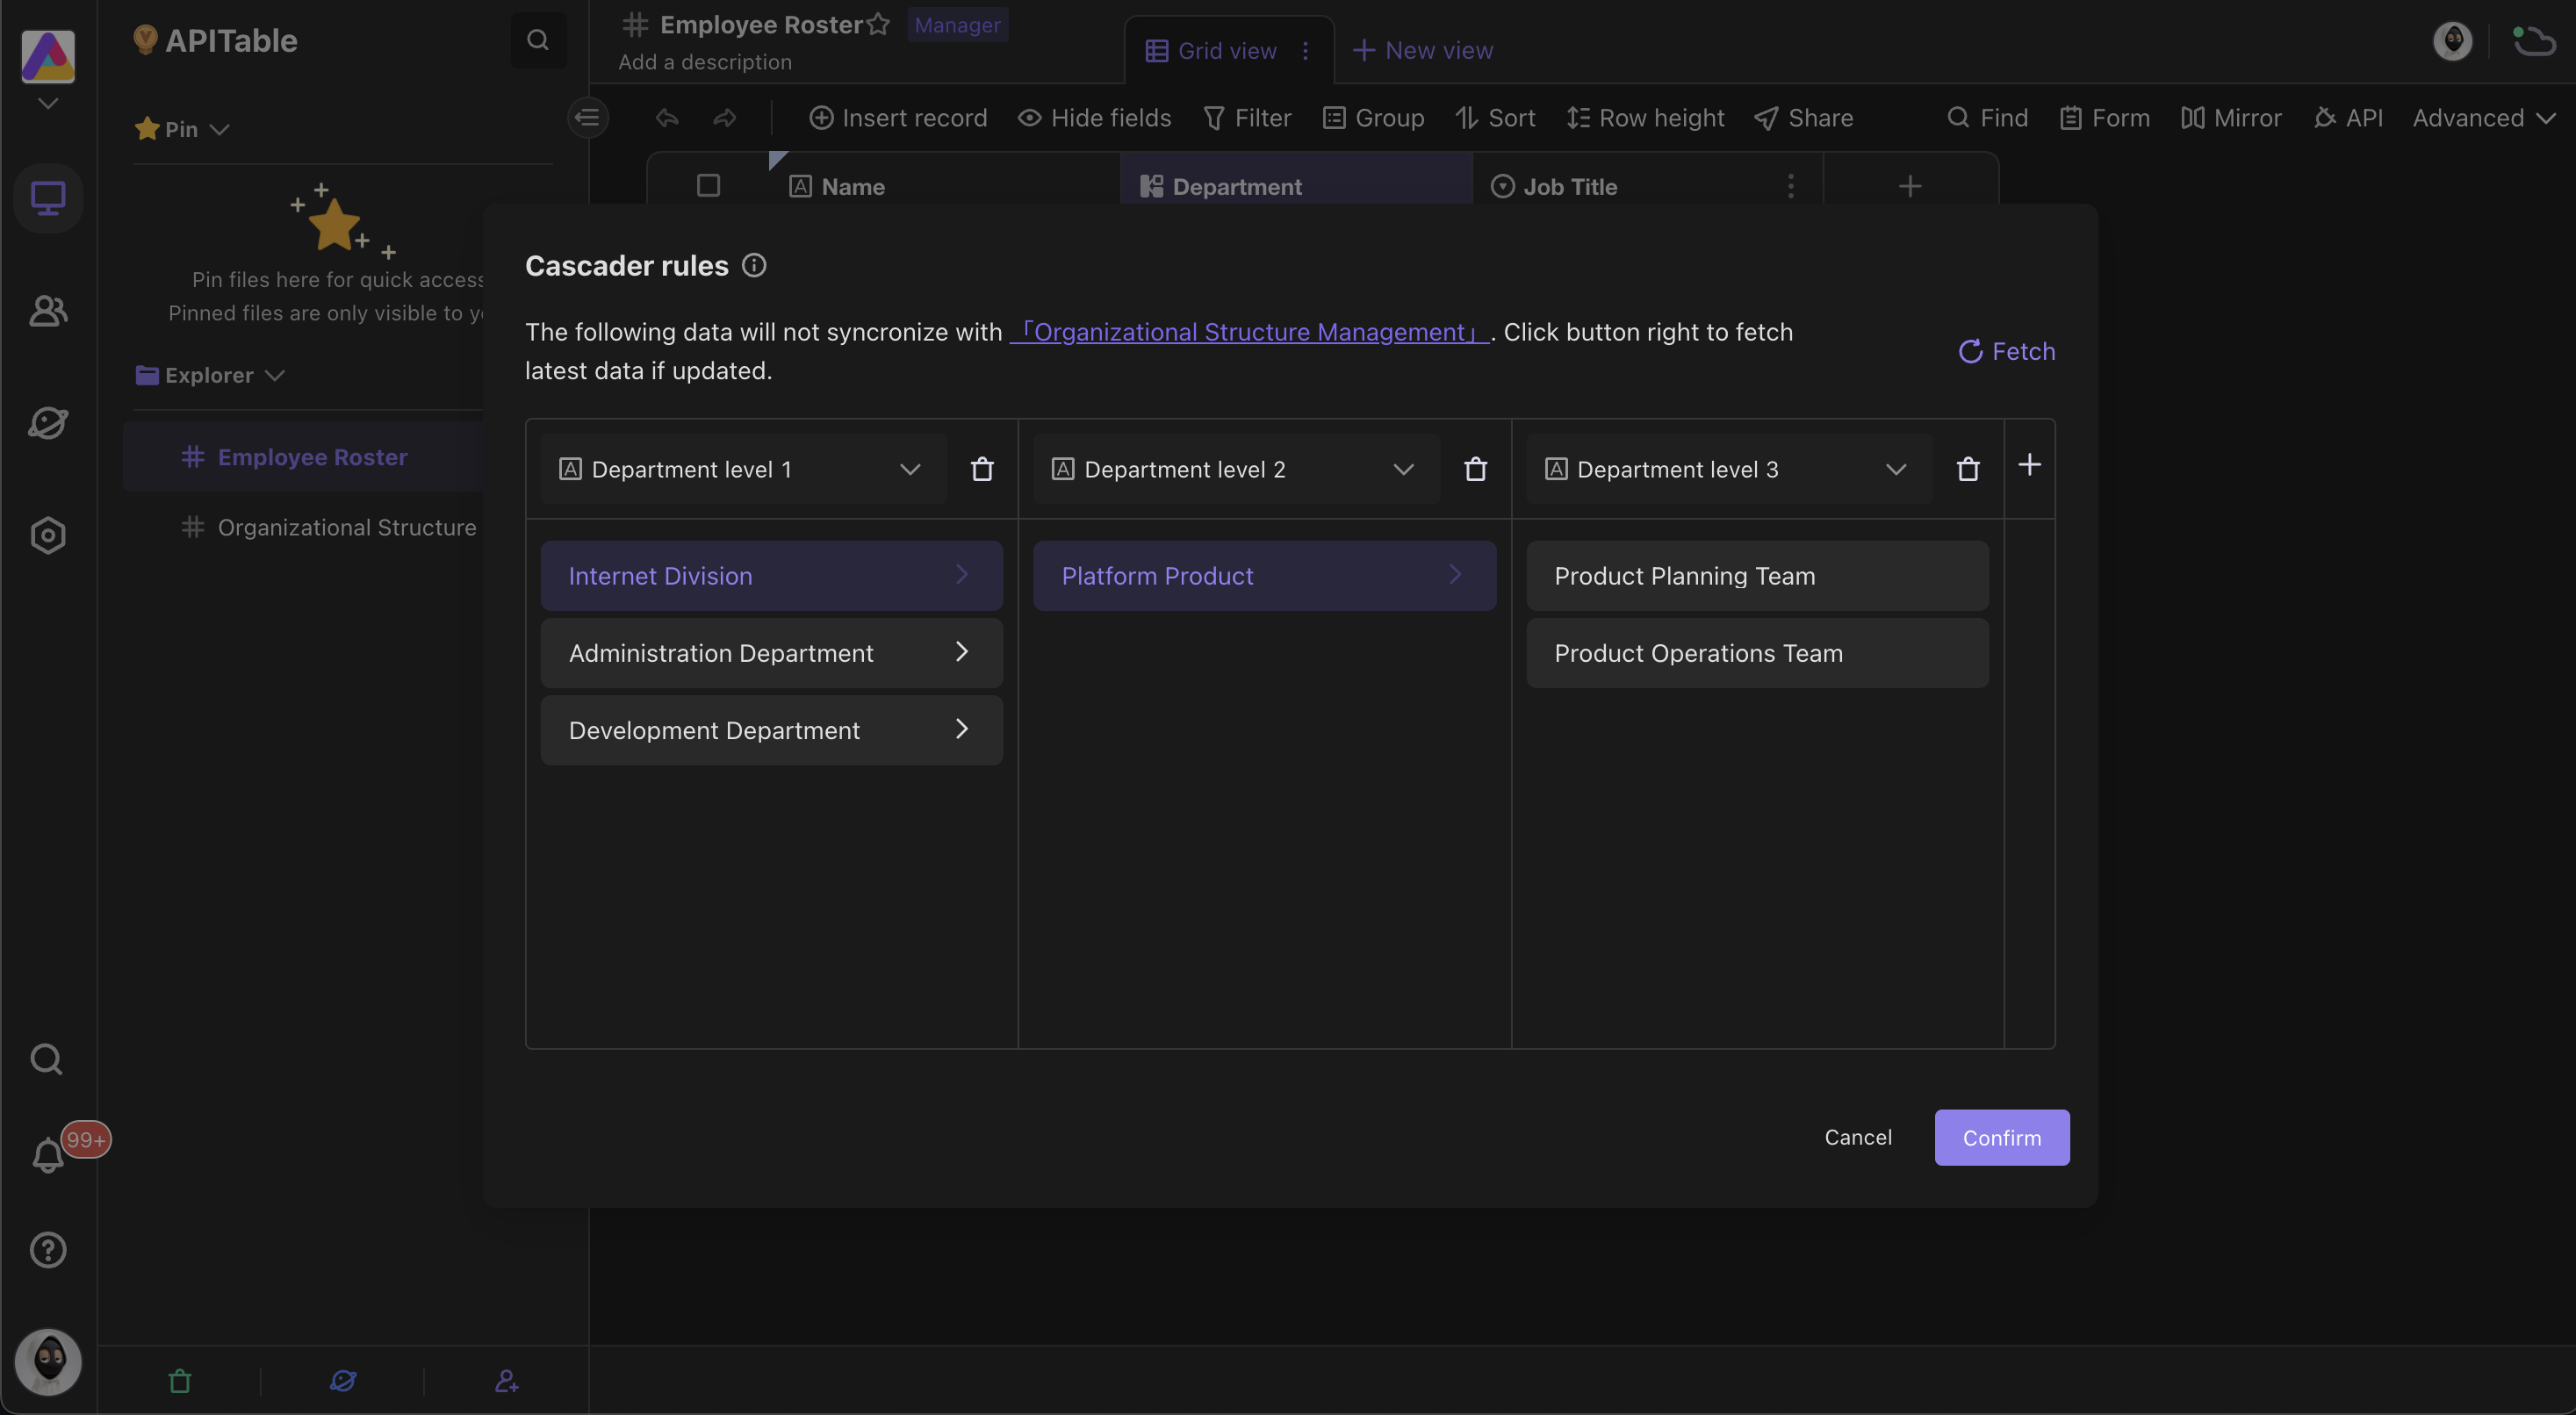
After you've chosen a hierarchy source, you can set up the cascading rules. As shown in the figure below, you can add the options that the user must choose in a cascading order from left to right under this modal window (minimum of two relationships and maximum of five relationships). It is recommended that you make your selection in the order listed on the configuration datasheet, as this will make it easier to maintain.
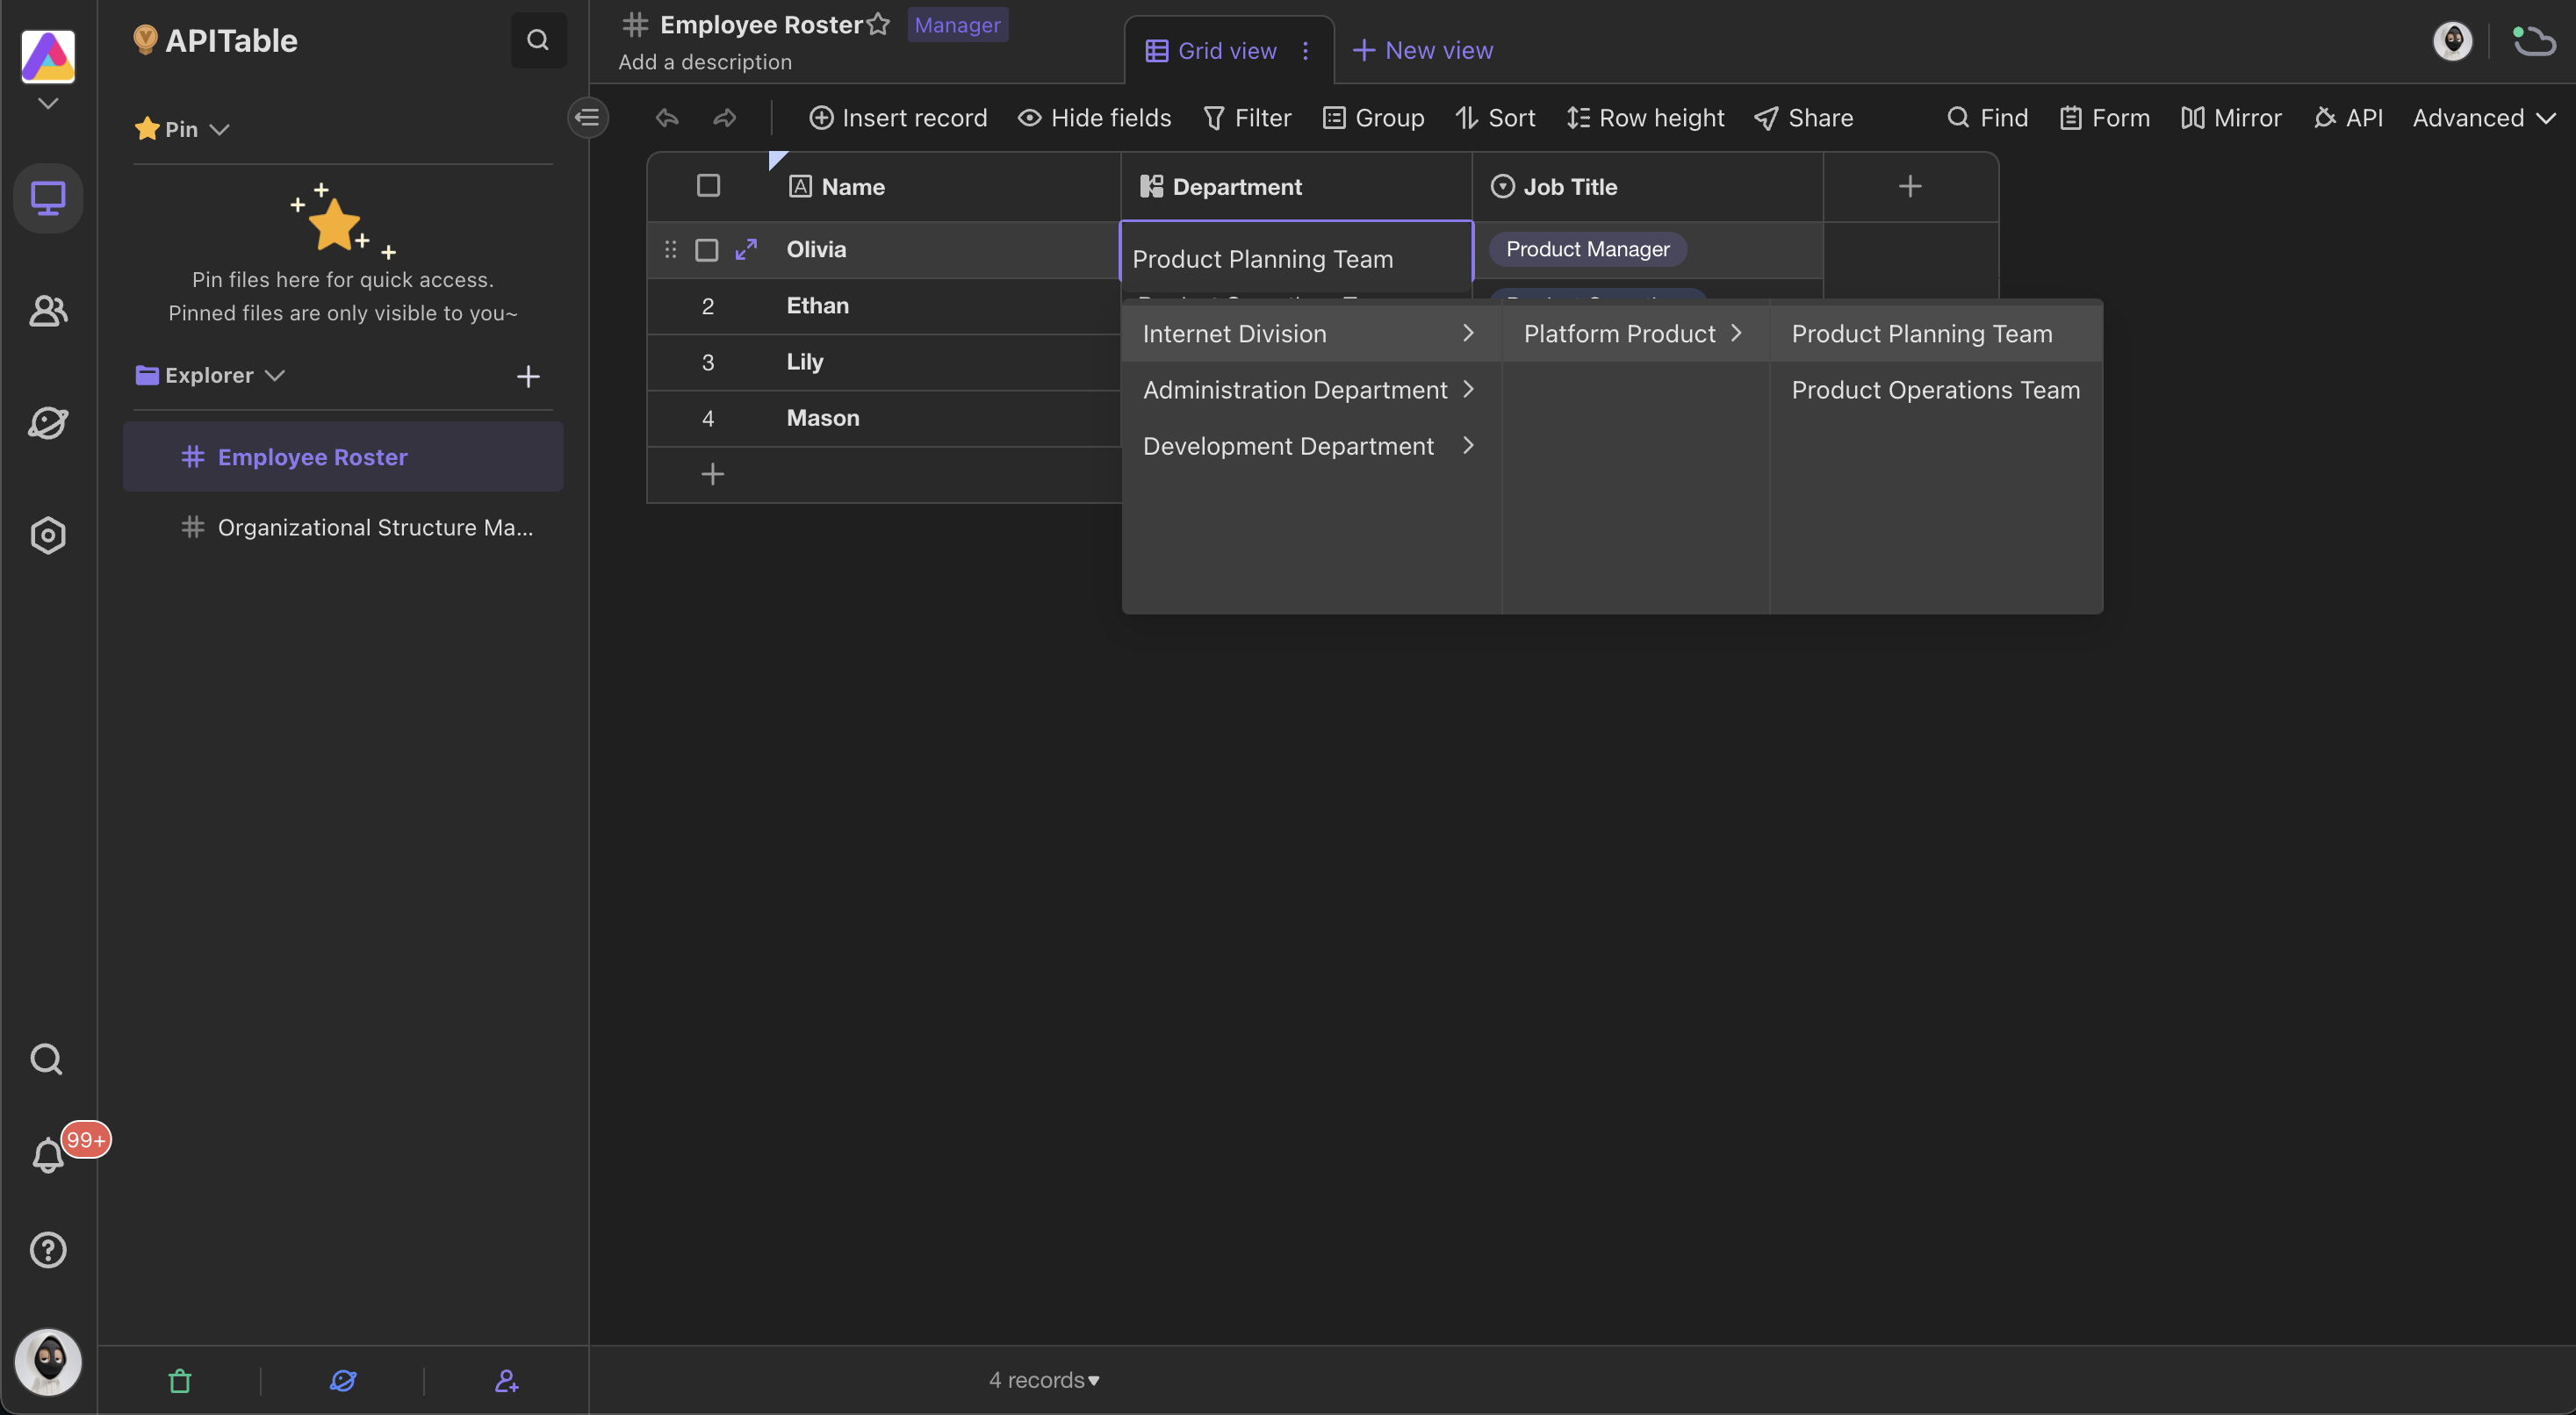
After you've confirmed the cascading rules, double-click on the cell to make a hierarchical selection based on your settings.
Advanced settings
Display the full hierarchy path
In the configuration menu, you can choose whether to display the full hierarchy. When the option is toggled off, the data in the Cascader field will only present the content of the last hierarchy. When the option is toggled on, the data in the Cascader field will present all of the hierarchy levels.
Q & A
Q: What should I do if my configuration datasheet has been updated but the old value remains in the cells?
A: To ensure that accidental changes to the configuration datasheet do not affect the cascader content, select "Config" in the corresponding cascader field and click "Fetch" in the pop-up modal window after each modification to the configuration datasheet to update the content.